Introduction to Perfectly Crispy Roast Duck
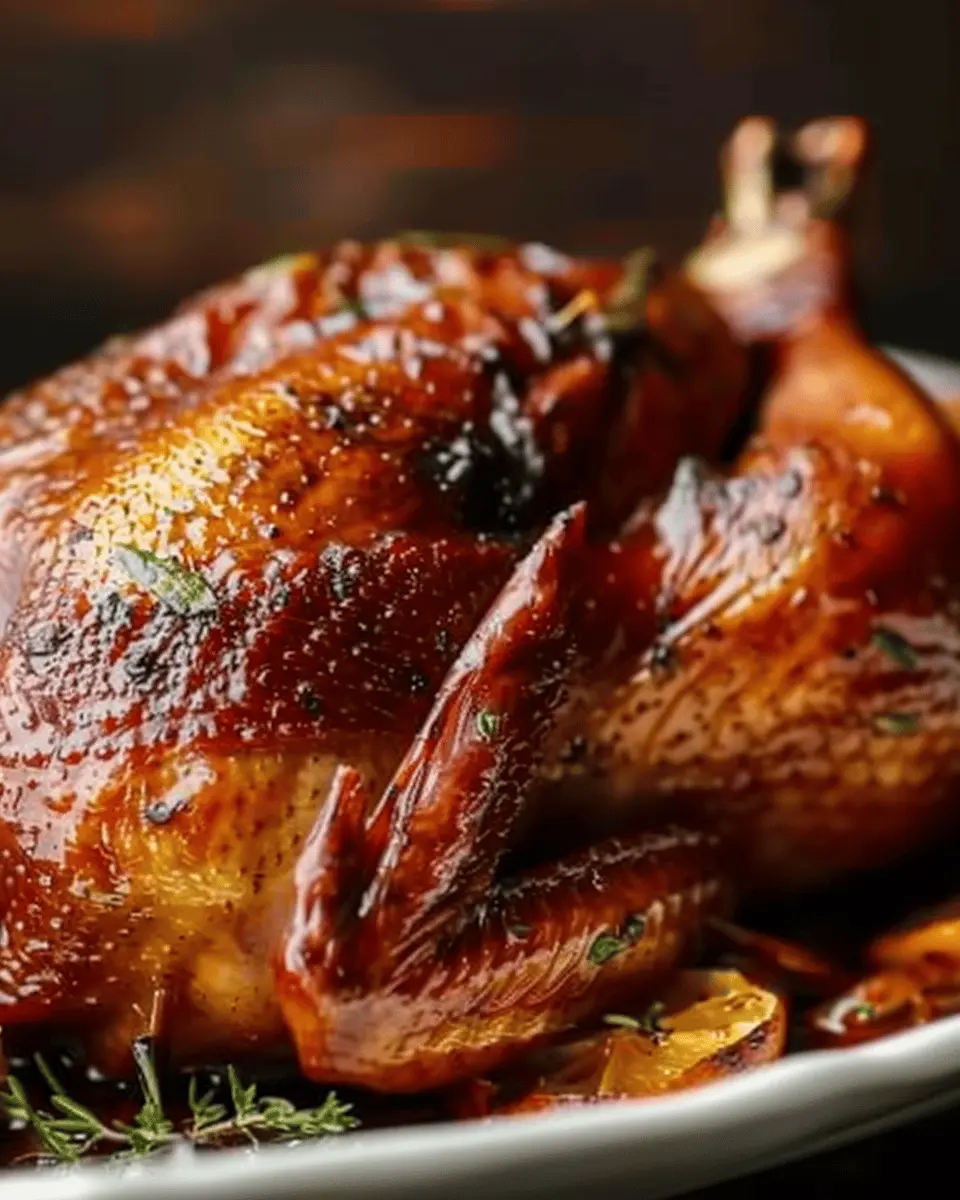
If you’re looking to impress your friends and family at your next dinner party, consider serving perfectly crispy roast duck. This dish isn’t just a meal; it’s an experience that elevates your gathering, making any occasion feel special. The contrast between the ultra-crisp skin and tender, juicy meat creates a delightful harmony that’s hard to beat.
Why Roast Duck is a Dinner Party Showstopper?
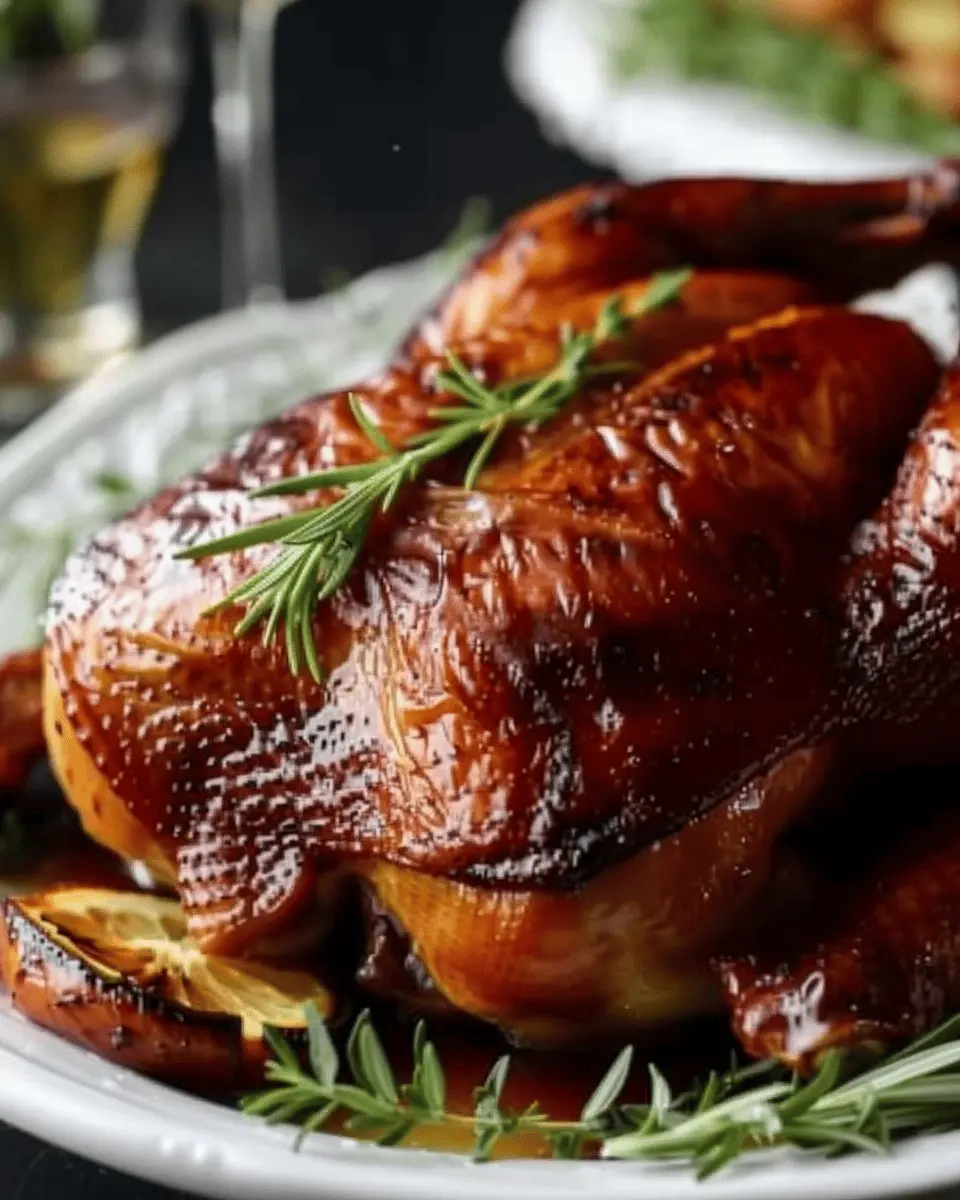
First, let’s talk about the aesthetic. There’s something undeniably captivating about a well-roasted duck sitting proudly at the center of the table. Its deep golden hue and glistening skin command attention, setting the stage for a memorable evening. A simple glance can inspire wow-factor, encouraging spirited conversations about your culinary skills.
But it’s not just about looks; flavor is the hero here. Experts agree that duck is richer and more flavorful than common proteins like chicken. According to culinary icon Julia Child, duck can elevate a meal from ordinary to extraordinary. By seasoning it just right and achieving that perfect crispiness, you’re setting the bar high for future dinner parties.
Let’s face it: many people shy away from cooking duck, assuming it’s complicated or requires skill only found in gourmet kitchens. But that’s where you’re in luck! With just a few key steps and a little patience, you too can master the art of perfectly crispy roast duck. For tips on roasting techniques, you might want to check out this informative guide on roasting meats.
As for sides, duck pairs beautifully with sweet-tart accompaniments like roasted cherry or orange sauce, which can add a splash of flavor and make the dish even more impressive. Consider whipping up a simple salad with seasonal greens and a light vinaigrette to balance the richness.
In the upcoming sections, I’ll walk you through my personal favorite recipe for making this delightful dish, ensuring you’ll feel confident enough to bring it to your dining table. So, grab your apron, and let’s get cooking!
Ingredients for Perfectly Crispy Roast Duck
When preparing a perfectly crispy roast duck, the right ingredients make a world of difference. Here’s what you’ll need to gather for that mouthwatering result you’re after:
The Star of the Show
- Duck: A quality whole duck (about 4-5 pounds) is essential. Look for one that’s well-marbled for that rich flavor.
Spice It Up
- Salt: Kosher salt works best; it helps draw moisture from the skin to achieve maximum crispiness.
- Pepper: Freshly ground black pepper adds that touch of warmth.
Aromatics for Flavor
- Garlic: 4-5 cloves, crushed. Garlic not only enhances flavor but also pairs wonderfully with duck.
- Fresh Herbs: Thyme or rosemary. These will add an aromatic touch to the meat.
The Crunch Factor
- Baking Powder: Just a tablespoon! This helps to dry out the skin, ensuring that glorious crunch.
Alternatives for a Personal Touch
Feel free to experiment with flavors! Add a dash of soy sauce or a splash of apple cider vinegar for an extra depth of flavor.
By following these ingredient tips, you’ll be on your way to enjoying the most perfectly crispy roast duck that will impress your friends and family. Consider checking out this guide for more expert advice on roasting duck!
Preparing Perfectly Crispy Roast Duck
Roast duck might seem intimidating, but with the right techniques, you can achieve a beautifully golden, perfectly crispy roast duck that will impress your friends and family. Let’s break down the process step by step to make this culinary creation achievable for everyone.
Gather Your Ingredients and Supplies
Before diving into the roasting wonder, let’s get organized. Here’s what you’ll need:
- Duck: A whole duck (around 5-6 pounds)
- Salt and pepper: For seasoning
- Aromatic ingredients: Think fresh herbs like rosemary or thyme, citrus fruits like oranges or lemons, and garlic.
- Baking tray and rack: Elevating your duck will keep the skin crispy!
- Sharp knife or scoring tool: For that crucial scoring step
- Meat thermometer: For perfectly cooked duck every time
Don’t forget to check out resources like the USDA for safe food handling and internal temperature guides!
Prepping the Duck to Achieve That Perfect Crisp
The key to achieving a crisp skin lies within the preparation. Start by thawing your duck completely (if frozen) for at least 24 hours in the fridge.
- Rinse and pat it dry: This removes any residual moisture, allowing for that coveted crispy skin.
- Trim excess fat: Ducks often come with a fair bit of fat. Trim any excess seen around the cavity to prevent grease-fueled flare-ups in the oven.
- Let it breathe: Allowing the duck to sit uncovered in your fridge for a few hours (or even overnight) helps to dry out the skin further, making your roast duck even crisper.
Scoring and Salting the Duck for Flavor
Scoring the skin of your duck is a game-changer.
- Make diagonal cuts: With a sharp knife, carefully score the skin in a diamond pattern, making sure not to cut into the flesh. This will allow the fat to render down and the skin to crisp up beautifully.
- Season generously: Rub salt all over the duck, including the inside cavity. Salt isn’t just for flavor; it helps draw out moisture, enhancing the crispiness.
Did you know that salt can actually change the molecular structure of proteins, resulting in juicier meat? Check out resources on salting techniques for further reading.
Stuffing Your Duck with Aromatic Ingredients
Stuffing your duck with aromatics not only enhances the flavor but also infuses the meat with delightful essences as it roasts.
- Choose your aromatics: Classic options include a halved orange or lemon, a handful of garlic cloves, or fresh herbs like thyme and rosemary.
- Don’t overdo it: Fill it lightly for the best cooking results; an overstuffed cavity can prevent even cooking.
Imagine the enticing smells wafting through your kitchen as your duck roasts, making it irresistible when dinner time arrives!
Roasting for Perfection
Now it’s time for the grand finale—roasting!
- Preheat oven: Set your oven to 425°F (220°C). High heat will help get that skin crispy.
- Arrange on a rack: Place your duck breast side up on a rack in the baking tray. This allows fat to drip away, ensuring crispy skin.
- Roast and monitor: Roast for about 1.5 to 2 hours, depending on the size of your duck. The internal temperature should reach about 165°F (74°C) in the thickest part of the thigh. If the skin isn’t crispy enough, you can give it a quick broil for the last few minutes.
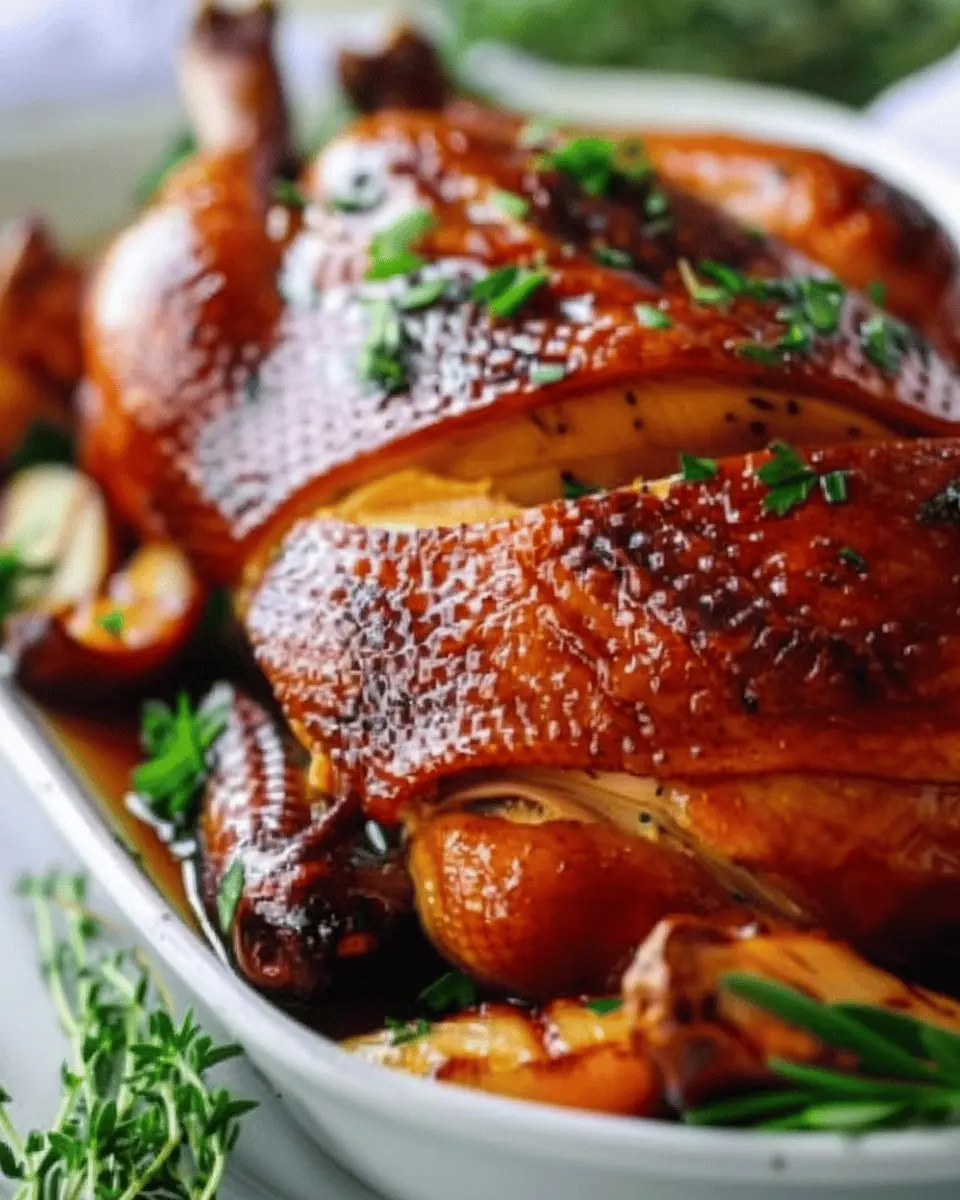
After resting the duck for about 15 minutes (easy to let that aroma fill the room), carve and serve!
With these steps, you’ll be well on your way to a perfectly crispy roast duck that not only tastes incredible but also looks stunning on your dinner table. Happy roasting!

Variations on Perfectly Crispy Roast Duck
Roast duck is a classic dish, but why not make it your own with some exciting variations? Here are a couple of ideas that can elevate your perfectly crispy roast duck to the next level.
Citrus Variations: Adding a Twist with Apples or Cherries
Citrus fruits aren’t just for cocktails or morning juice—they’re fantastic for roasting! Consider adding slices of orange or lemon into the cavity of your duck. The citrus will infuse the meat with a delightful zing.
Alternatively, incorporating seasonal fruits like apples or cherries can add a sweet and tart balance. Just core the apples and pit the cherries before stuffing them inside. Not only will these fruits enhance the flavor, but they’ll also create a delicious sauce as they roast, which you can drizzle on top before serving.
Herb Variations: Experimenting with Fresh Herbs
Herbs can be your best friend when it comes to roasting duck. While traditional thyme and rosemary are always safe bets, why not mix it up? Try using a combination of fresh sage and parsley, or even a little dill for something unexpected.
Mix chopped herbs with garlic and a hint of olive oil, then massage this mixture under the skin of the duck for a flavor explosion that will impress your guests. If you’re curious about the science of herb pairings, a fantastic read is available here.
Don’t forget that each of these variations allows you to personalize your perfectly crispy roast duck experience, making it uniquely yours. Happy cooking!
Cooking Tips and Notes for Perfectly Crispy Roast Duck
Preparing Ahead: The Importance of Drying the Skin
Achieving that perfectly crispy roast duck starts with the skin. A common mistake? Skipping the drying process. After you’ve cleaned and patted the duck dry, let it rest uncovered in the refrigerator for several hours—or even overnight. This crucial step helps the skin lose moisture, ensuring that you get that irresistible crunch when it’s cooked.
Cooking Techniques: Frequency of Basting
When roasting, don’t underestimate the power of basting! For the crispiest skin, baste the duck every 20-30 minutes with its own rendered fat. This not only enhances flavor but also contributes to that golden, crunchy texture we all crave. Just make sure not to overdo it—too much moisture can make the skin soggy. Be patient, and your efforts will pay off in a beautifully roasted duck.
For more on duck and related poultry cooking techniques, check out Serious Eats for expert advice!
Serving Suggestions for Perfectly Crispy Roast Duck
Pairing with Seasonal Vegetables
As you savor your perfectly crispy roast duck, consider accompanying it with seasonal vegetables like roasted Brussels sprouts or glazed carrots. Not only do these veggies add a pop of color to your plate, but they also balance the richness of the duck. In the fall, try caramelized butternut squash or sautéed green beans; they complement the savory notes beautifully. Explore seasonal recipes on Food Network for more inspiration!
Suggested Sides: Wild Rice and Salads
For sides, wild rice is a fantastic choice. Its nutty flavor and chewy texture perfectly contrast with the crispy skin of the duck. You could also throw in a fresh salad, perhaps with mixed greens, sliced pears, and a tangy vinaigrette—ideal for cutting through the richness. Don’t forget to add toppings like Turkey Bacon or Chicken Ham for a delightful crunch. Trust me, this combination will elevate your dining experience, making it all the more memorable!
Incorporate these ideas, and you’re sure to impress at your next gathering!
Time Breakdown for Perfectly Crispy Roast Duck
Preparation Time
Getting ready for your perfectly crispy roast duck takes about 30 minutes. This includes cleaning the duck, drying the skin, and seasoning to ensure maximum flavor. Don’t forget to score the skin—this is key for achieving that delightful crispy texture.
Cooking Time
Once you’ve prepped the duck, it needs around 2 hours in the oven at a steady heat. This time allows the skin to render beautifully while keeping the meat juicy and tender. For the crispiest result, consider a basting routine—high heat at the end really makes a difference!
Total Time
In total, you’re looking at approximately 2 hours and 30 minutes. This includes both prep and cooking. Although it may seem like a commitment, the results are undeniably worth it! Perfectly crispy skin paired with tender meat can’t be rushed. For additional tips on timing, you can check resources like The Spruce Eats for expert insights.
By following this guide, you’re well on your way to impressing friends and family with a delicious feast!
Nutritional Facts for Perfectly Crispy Roast Duck
Understanding the nutritional value of your dish can enhance your culinary experience. Here’s a quick look at the nutritional facts for your perfectly crispy roast duck:
Calories
A serving of roast duck provides approximately 300-400 calories. This makes it a flavorful choice for a special occasion, balancing indulgence with nutritional consciousness.
Fat Content
Duck is often celebrated for its richness, containing about 20-30 grams of fat per serving. While this may sound high, many of these fats are unsaturated, which can be beneficial for heart health when consumed in moderation.
Protein
When it comes to protein, you’re looking at around 25-30 grams per serving. This makes it a powerhouse for sustaining energy, especially if you’re pairing it with healthy sides like roasted vegetables or grain salads, making for a well-rounded meal.
Curious about the specific benefits of duck compared to other meats? Check out Healthline for detailed insights!
FAQs about Perfectly Crispy Roast Duck
How can I ensure my roast duck has crispy skin?
To achieve that perfectly crispy roast duck skin, there are a few techniques you can use. Start by scoring the skin in a diamond pattern, taking care not to cut into the meat. This allows the fat to render out, resulting in a crunchy exterior. Dry the duck thoroughly before roasting—this helps moisture escape, which is crucial for crispiness. Consider rubbing the skin with salt, which not only enhances flavor but also draws out moisture. Lastly, roasting at a high temperature initially can create that desirable crispy layer while ensuring the meat remains juicy.
What are the best sides to serve with roast duck?
When it comes to sides, think flavors that complement the rich taste of the duck. Here are a few crowd-pleasers:
- Roasted root vegetables: Carrots, parsnips, and sweet potatoes add natural sweetness.
- Garlic mashed potatoes: Creamy and comforting, they balance the duck’s richness.
- Sautéed greens: Consider kale or spinach, which provide a refreshing contrast.
- Fruit-based sauces: A tangy cherry or orange sauce can elevate your perfectly crispy roast duck experience.
For more side dish ideas, you can browse resources like BBC Good Food or Bon Appétit.
Can leftovers be stored, and how should I reheat them?
Absolutely! Leftover roast duck can be a delicious treat for days. Store it in an airtight container in the refrigerator for up to 3 days. When reheating, aim to keep the skin crispy by using an oven or air fryer instead of a microwave. Preheat your oven to 350°F (175°C) and place the duck on a baking sheet, covering the meat with foil to prevent over-drying. Heat it for about 15-20 minutes, and you’ll have leftovers that taste just as divine as the original meal!
Conclusion on Perfectly Crispy Roast Duck
In conclusion, achieving perfectly crispy roast duck is both an art and a science, bringing together the right techniques and the best ingredients. Remember that patience is key—drying out the skin and managing the cooking temperature are crucial steps for that coveted crispy exterior.
To elevate your dish, consider accompanying it with seasonal sides like roasted vegetables or a tangy fruit sauce. As you indulge in your creation, think about the joy of sharing this delightful meal with friends and family. For more inspiration, check out this guide on duck preparation or learn how to pair it with complementary flavors here. Happy cooking!
PrintPerfectly Crispy Roast Duck Recipe: Your Guide to a Juicy Delight

Learn how to make the perfect crispy roast duck with this easy-to-follow guide.
- Prep Time: 15 minutes
- Cook Time: 2 hours
- Total Time: 2 hours 15 minutes
- Yield: 4 servings 1x
- Category: Main Course
- Method: Roasting
- Cuisine: Chinese
- Diet: Paleo
Ingredients
- 1 whole duck
- 2 teaspoons salt
- 1 tablespoon black pepper
- 1 tablespoon five-spice powder
- 1 orange, halved
Instructions
- Preheat your oven to 350°F (175°C).
- Rub the duck with salt, pepper, and five-spice powder.
- Stuff the cavity of the duck with orange halves.
- Place the duck on a rack in a roasting pan and roast for 1.5 hours.
- Increase the oven temperature to 400°F (200°C) and roast for an additional 30 minutes until crispy.
- Let rest for 15 minutes before carving.
Notes
- For extra crispy skin, you can dry the duck in the fridge overnight before cooking.
- Enjoy with a side of roasted vegetables.
Nutrition
- Serving Size: 1 serving
- Calories: 550
- Sugar: 0 grams
- Sodium: 500 milligrams
- Fat: 40 grams
- Saturated Fat: 10 grams
- Unsaturated Fat: 25 grams
- Trans Fat: 0 grams
- Carbohydrates: 0 grams
- Fiber: 0 grams
- Protein: 40 grams
- Cholesterol: 100 milligrams
Keywords: crispy roast duck, roast duck recipe, duck recipe