Introduction to Geode Cookies
What are Geode Cookies and why are they a must-try?
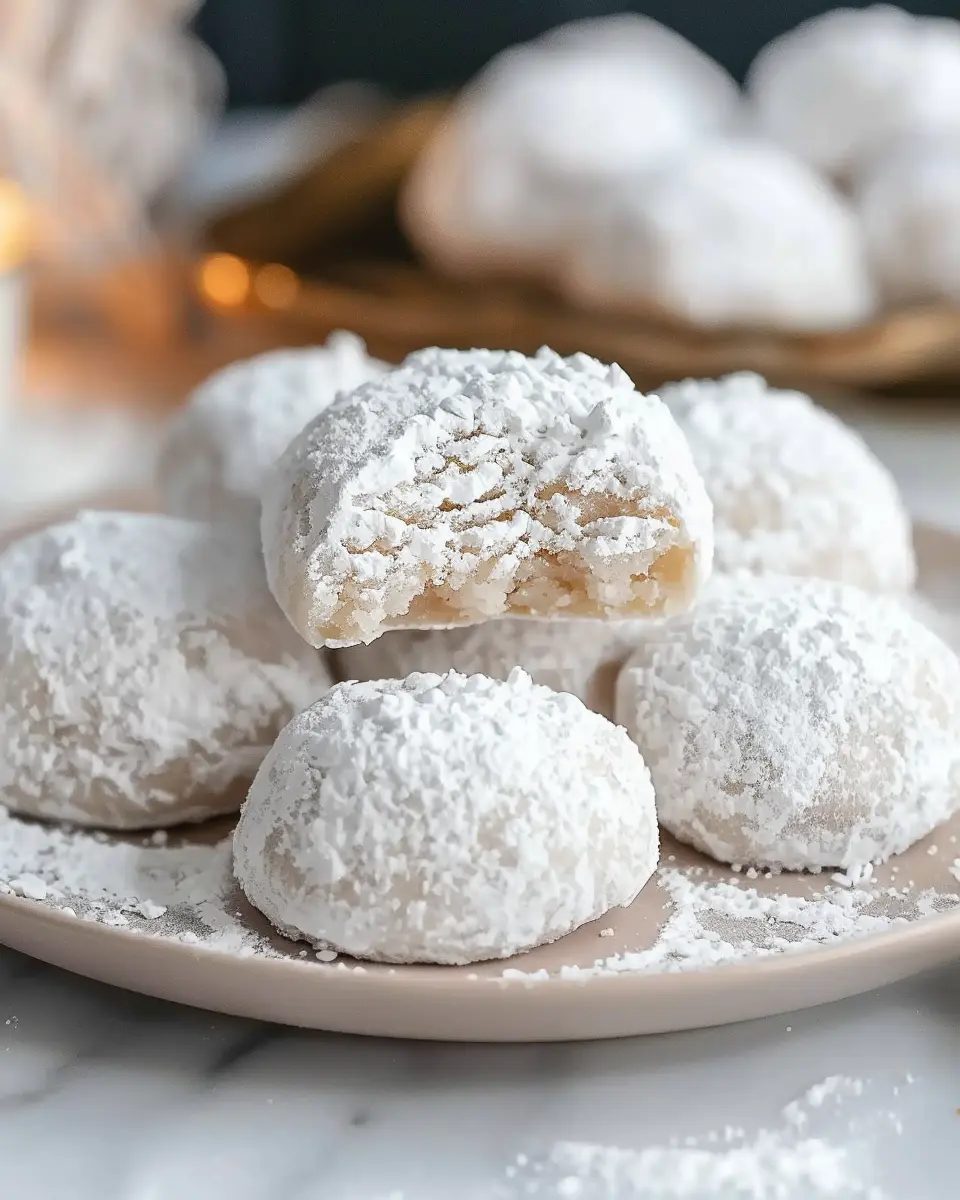
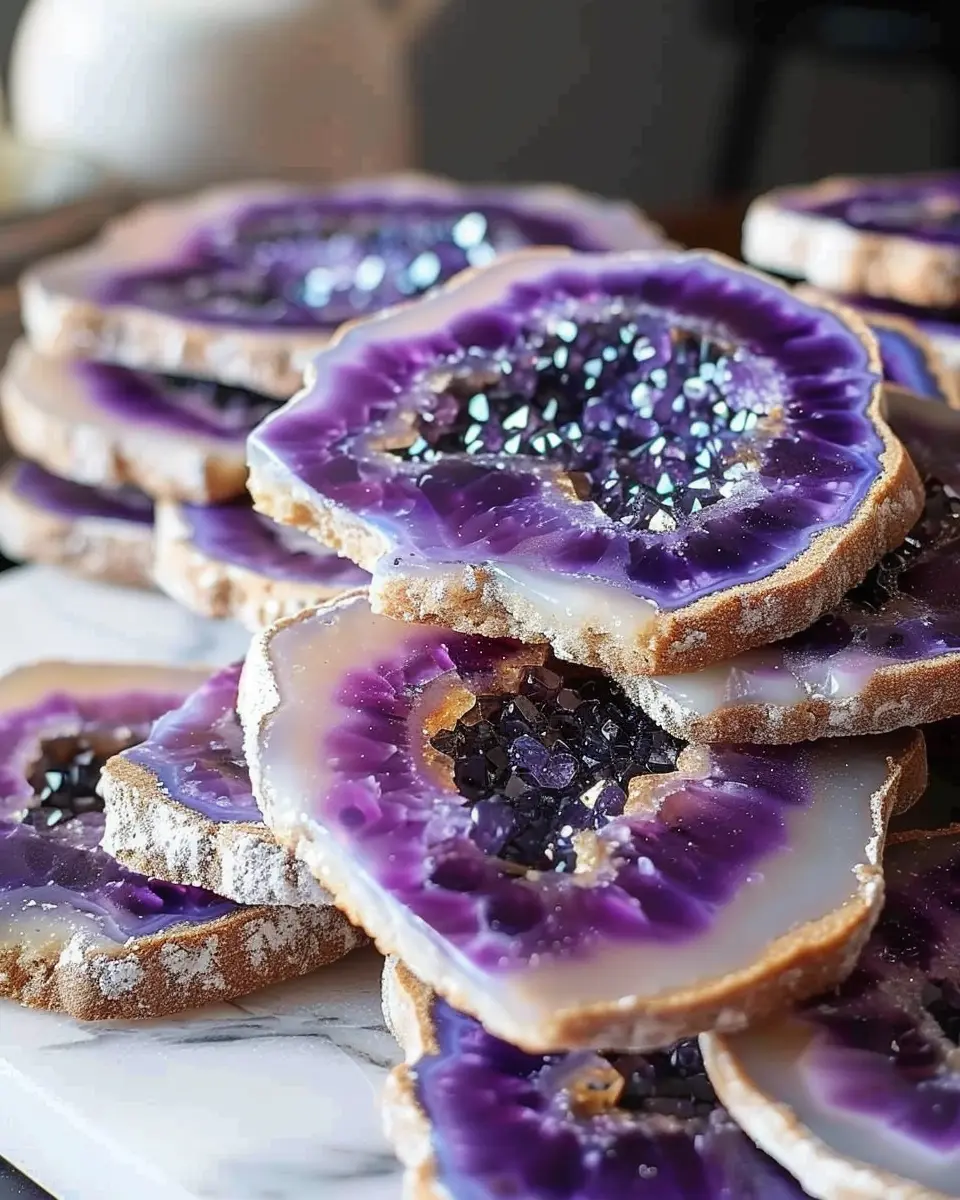
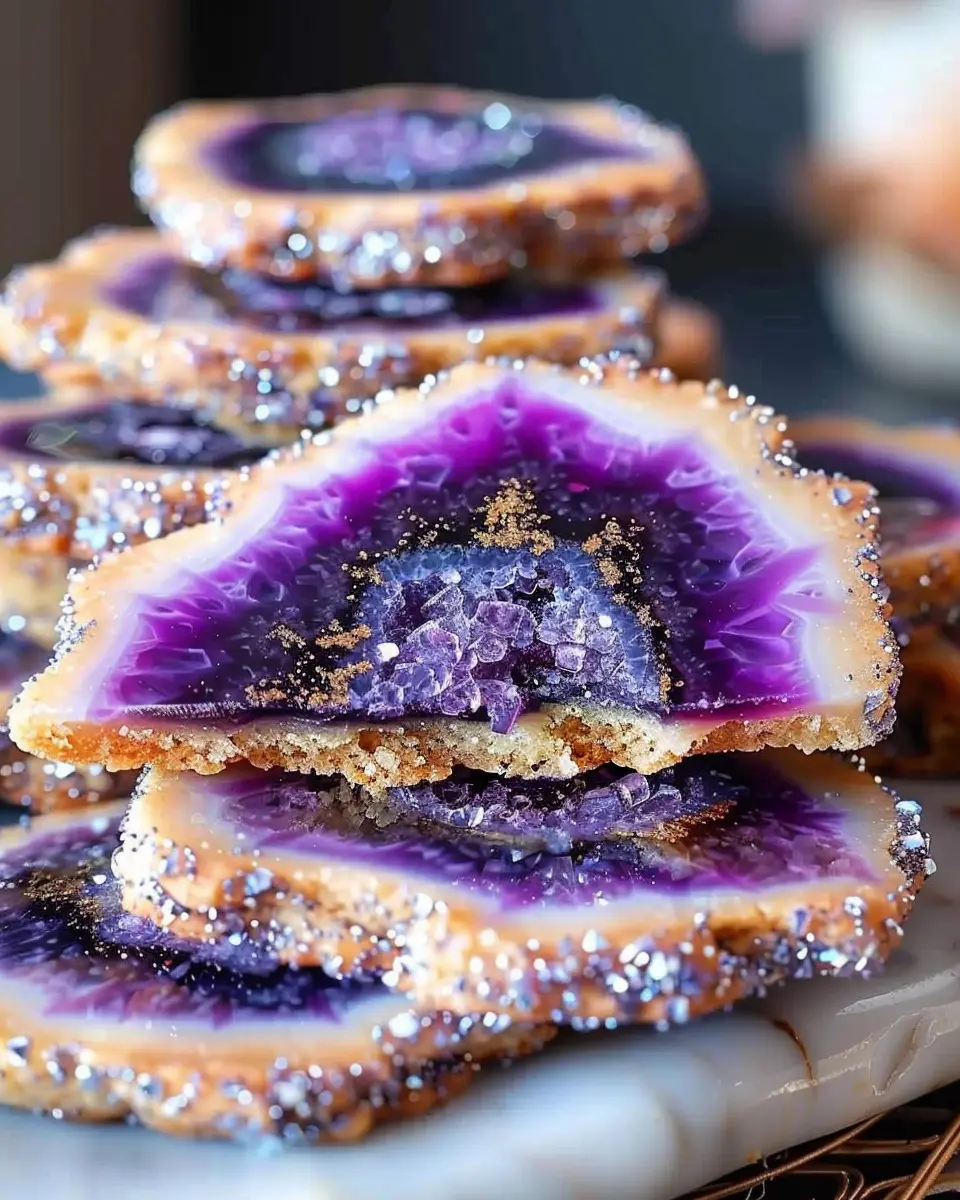
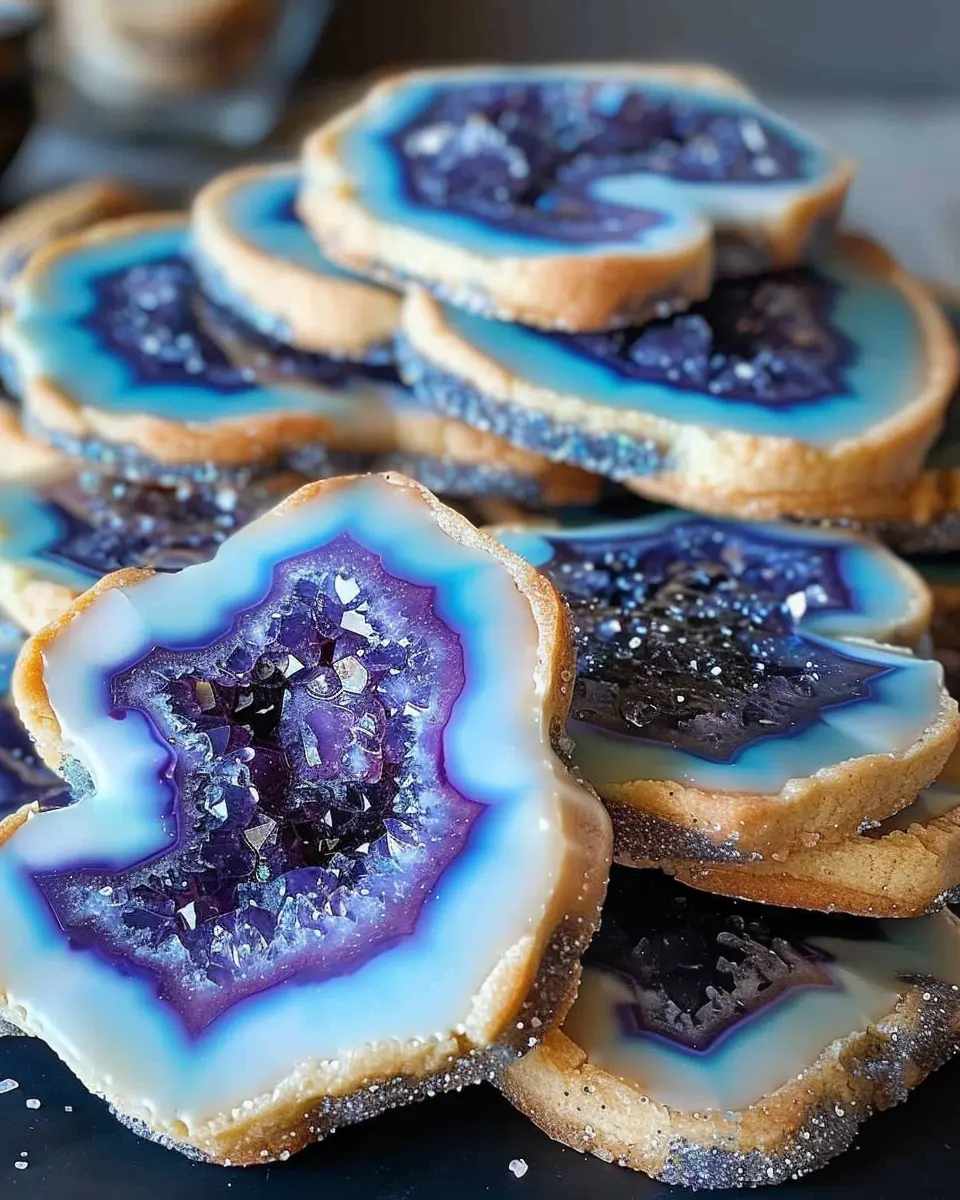
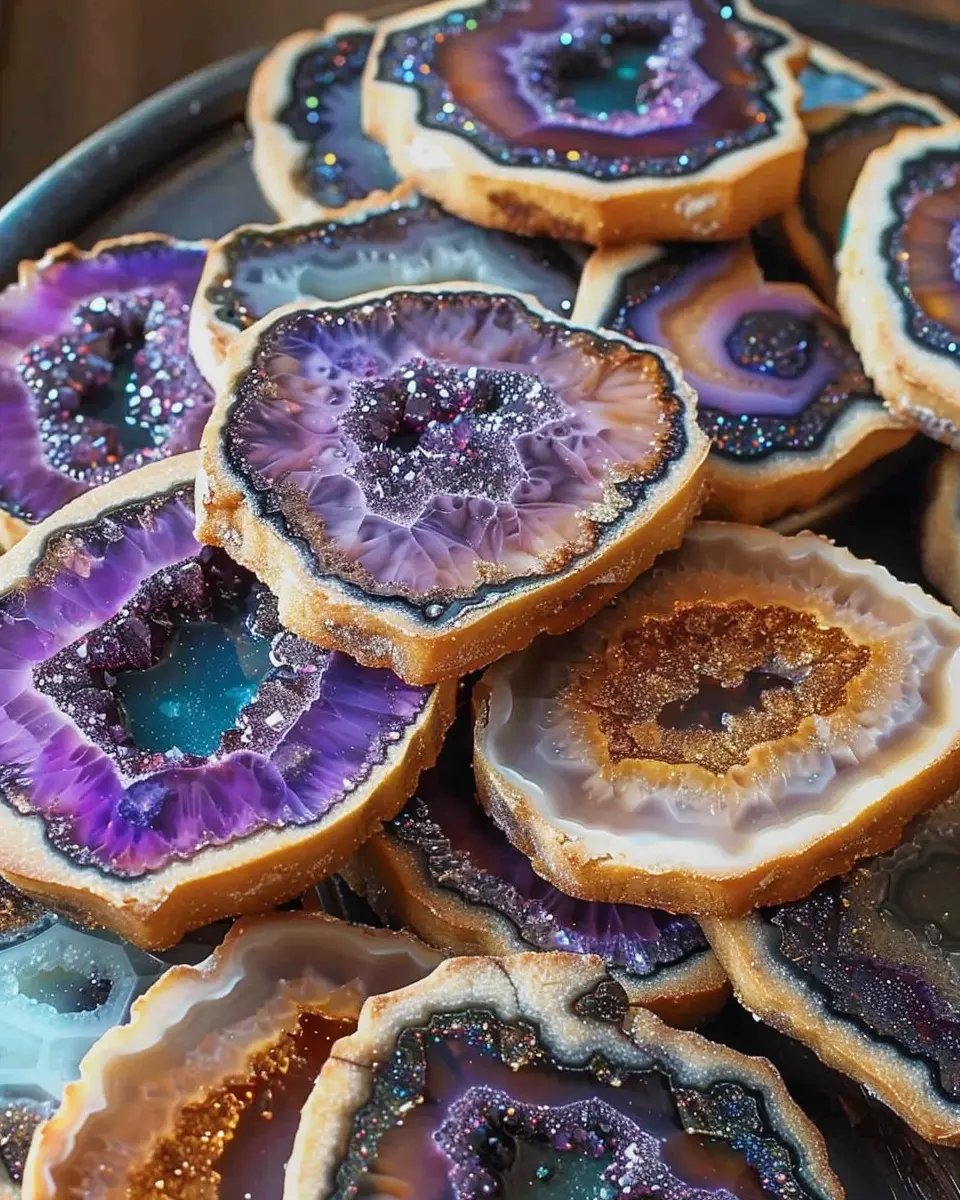
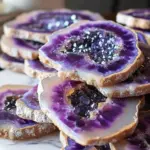
If you’ve ever scrolled through social media and stumbled upon stunning, crystalline desserts, chances are you’ve encountered geode cookies. These beautiful, eye-catching treats aren’t just a feast for the eyes—they are a delightful combination of flavors that can elevate any gathering. Essentially, a geode cookie is a sugar cookie designed to mimic the appearance of a natural geode, complete with colorful sugar crystals that shine bright, turning any simple cookie into an exquisite piece of art.
But what makes this geode cookies recipe absolutely irresistible? For starters, the aesthetic appeal! The vibrant, crystal-like decorations evoke a sense of wonder and creativity. Imagine walking into a party and spotting these shimmering delights on the dessert table! Guests will marvel at your baking skills and surely snap a few photos before indulging.
Beyond their dazzling looks, geode cookies are surprisingly fun to make! They allow for creativity, making them perfect for a weekend baking project or a fun date night activity. You can experiment with different colors and flavor combinations, catering to your personal taste or the preferences of your guests. For a deeper dive into the world of creative baking, take a look at resources like Food Network or Bon Appétit which often feature visually striking dessert recipes.
Not only are geode cookies beautiful and customizable, but they also offer a unique take on traditional cookie recipes. Whether you want to impress friends, bring a delightful dessert to a potluck, or simply enjoy a sweet treat on your own, these cookies are a must-try.
In this article, you’ll find a step-by-step geode cookies recipe that will guide you through the process of creating these stunning baked goods. So, roll up your sleeves, gather some ingredients, and let’s dive into the delightful world of geode cookies!
Ingredients for Geode Cookies
Essential ingredients you’ll need
Creating stunning geode cookies requires some essential ingredients that bring both flavor and aesthetics to the table. Here’s what you’ll need:
- Sugar: Granulated sugar is a must for sweetness and texture.
- Butter: Use unsalted butter for a rich, creamy base.
- All-purpose flour: This gives the cookies their structure.
- Eggs: These help bind ingredients together and add moisture.
- Baking soda: A leavening agent that ensures cookies rise beautifully.
- Vanilla extract: For that delicious warmth and depth of flavor.
- Food coloring: Get creative with vibrant hues to mimic gemstones.
Optional mix-ins for personal touches
Beyond the basics, consider adding your personal flair with optional mix-ins. Why not try:
- Chocolate chips: A classic that never goes out of style.
- Nuts: Chopped almonds or walnuts add a satisfying crunch.
- Dried fruit: Bring a chewy contrast with cranberries or apricots.
- Sprinkles: Add whimsical touches that appeal to all ages.
Feel free to experiment and adapt as you go! For more creative inspiration, check out this article on baking tips. Your geode cookies recipe will be uniquely yours, bursting with flavor and personality.
Preparing Geode Cookies
Baking geode cookies not only tantalizes your taste buds but also sparks your creativity in the kitchen. These gorgeous cookies are as fun to make as they are to eat, and I can’t wait to walk you through the process of crafting these delightful treats. Let’s get those flour-covered hands ready!
Gather and prep your ingredients
Before diving into the geode cookies recipe, it’s essential to gather all your ingredients. Here’s what you’ll need:
- 2 ¾ cups all-purpose flour
- 1 teaspoon baking soda
- 1 teaspoon baking powder
- ½ teaspoon salt
- 1 cup unsalted butter, softened
- 1 cup granulated sugar
- ½ cup brown sugar, packed
- 2 large eggs
- 1 teaspoon vanilla extract
- A variety of colorful candy crystals (think rock candy or jimmies)
Having everything on hand simplifies the mixing process and increases your efficiency. Trust me; it saves you from the dreaded “Oh no, I forgot to add the sugar!” moments.
Mix the dry ingredients to perfection
In a medium bowl, measure out your all-purpose flour, baking soda, baking powder, and salt. Whisk them together until they’re well combined. This step is crucial because it ensures that your leavening agents are evenly distributed throughout the cookie dough. An even mix results in consistently fluffy, delightful cookies.
Cream the butter and sugars for a fluffy base
Moving on to a larger mixing bowl, grab your softened unsalted butter and both the granulated and brown sugar. Using a hand mixer or stand mixer, cream them together until the mixture becomes light and fluffy—about 3-4 minutes. This process incorporates air into the mixture, setting the stage for airy, melt-in-your-mouth cookies.
Incorporate eggs and vanilla for added flavor
Next, we’ll add the eggs and vanilla extract to our butter-sugar mixture. Beat them in one at a time, ensuring each is well combined before adding the next. The vanilla not only brings a lovely aroma but enhances the overall flavor profile of your cookie. You might find yourself daydreaming of cookie heaven as you mix; I know I do!
Combine dry and wet ingredients seamlessly
Now, it’s time to marry your dry ingredients with the wet ones. Gradually add your flour mixture to the creamed butter and sugars. Stir gently until just combined. Avoid over-mixing; we want those cookies to stay tender and fluffy. This is part of the science of baking, which can feel like a delicate dance!
Fold in those colorful candy crystals
Ah, the pièce de résistance! Carefully fold in your colorful candy crystals, making sure they’re evenly distributed throughout the dough. It’s beautiful to see the vibrant colors speckled throughout your cookie dough. These will create the geode-like effect when baked—trust me, this is where the magic begins!
Scoop and shape the dough for baking
Using a cookie scoop or a tablespoon, portion out the dough onto a prepared baking sheet lined with parchment paper. If you want to shape them into more of a “geode” look, you can slightly flatten the balls before baking. Just remember to leave enough space between each cookie so they can spread as they bake.
Bake and cool to achieve the perfect texture
Pop those trays into a preheated oven at 350°F (175°C) and let them bake for about 10-12 minutes. You’ll know they’re ready when the edges are lightly golden but the centers still appear slightly soft. Let them cool on the baking sheet for a few minutes before transferring them to a wire rack. This cooling time allows them to set properly—essential for achieving that perfect texture.
That’s it! Following this geode cookies recipe will surely impress your friends, and you’ll have a batch of stunning, delicious cookies ready for any occasion. Happy baking!
Variations on Geode Cookies
When it comes to geode cookies, the possibilities are as spectacular as their appearance. These unique treats can easily be customized to fit any preference, making them a hit for various occasions. Let’s explore some delightful variations!
Colorful Geode Cookies with Different Candy Crystals
One of the simplest ways to elevate your geode cookies recipe is by experimenting with candy crystals. You can use:
- Rock candy: Perfect for that authentic geode look, available in various colors.
- Sugar crystals: Colorful sprinkles can add a playful touch.
- Jelly beans or gummies: These can provide a fun twist and a burst of flavor.
Each type of candy can bring a new aesthetic dimension, allowing you to create cookies that are not only delicious but also visually stunning.
Gluten-Free Geode Cookies for Dietary Needs
For those with dietary restrictions, gluten-free offerings can be just as delightful. By substituting traditional flour with almond or coconut flour, or even a store-bought gluten-free flour blend, you can achieve that same crunchy exterior and soft interior typical of geode cookies. Plus, check out resources like the Gluten Intolerance Group to gain more insights on gluten-free baking.
Flavor Variations: Chocolate or Citrus Zest
Why stick to plain vanilla when you can have so much more? Consider infusing your geode cookies with rich chocolate or zesty citrus for a burst of flavor.
- Chocolate: Adding cocoa powder or chocolate chips can create an indulgent treat.
- Citrus zest: A hint of lemon or orange zest will brighten up the flavors and add a refreshing twist.
These variations not only enhance the taste but also cater to diverse palates, ensuring your geode cookies are a crowd-pleaser at every gathering. With these tips, you’re well on your way to becoming a geode cookie aficionado!
Baking Tips for Geode Cookies
Achieving the Right Consistency in the Dough
When it comes to the geode cookies recipe, the consistency of your dough is crucial for achieving that perfect, spreadable texture. Start by ensuring your butter is at room temperature; this makes it easier to cream with sugar and creates a light, airy dough. If the dough feels too sticky, add a pinch of flour until you reach a smooth, pliable consistency. Remember, the dough should not be crumbly, nor too wet. A good balance is key!
Best Practices for Baking Time and Temperature
Baking time and temperature can make or break your cookies. Preheat your oven to 350°F (175°C) for even baking. Bake your geode cookies for about 10-12 minutes, or until the edges are slightly golden. To ensure they don’t overbake, keep a close eye on them in the last few minutes. Use an oven thermometer if needed, as even a few degrees can impact the final product.
For more tips on baking, check out BBC Good Food’s expert guides for consistent results! The effort you put into perfecting your bake will truly shine through in those delicious geode cookies.
Serving Suggestions for Geode Cookies
Creative ways to present your cookies
When showcasing your geode cookies, presentation is key. A simple yet effective way to elevate your display is to use a tiered cake stand. This allows the vibrant colors and crystalline formations of your cookies to take center stage. For a fun twist, place the cookies on a bed of edible glitter or rock candy to mimic the geode effect. Feel free to arrange them on a rustic wooden board or alongside small, colorful stones (non-edible!) to complement their natural beauty. Adding a personalized touch, such as a small tag with your geode cookies recipe, can make your display feel even more special.
Pairing suggestions that elevate the dessert
To enhance your geode cookie experience, consider pairing them with delightful accompaniments. A scoop of creamy vanilla or lemon sorbet adds a refreshing contrast. For a beverage, opt for a lightly brewed herbal tea or flavored sparkling water, which balances the sweetness perfectly. If you’re feeling adventurous, serve these cookies alongside a cheese platter featuring creamy brie or tangy goat cheese; the unique flavors can create a harmonious savory-sweet combo that will surprise and delight your guests.
For more inspiration on unique pairings, check out The Kitchn for imaginative ideas!
Time Breakdown for Geode Cookies
Preparation Time
Making your geode cookies is a fun and creative adventure that requires a little prep time! You’ll typically need about 30 minutes to gather your ingredients, whip up the dough, and shape the cookies into a dazzling geode form. Don’t forget to let your creativity shine during this stage!
Baking Time
Once your geode-shaped cookies are prepped, it’s time to bake! Pop them into the oven for approximately 10-12 minutes. Keep an eye on them; they should be just golden around the edges to ensure a perfectly soft center.
Total Time from Start to Finish
In total, you’re looking at about 40-45 minutes from start to finish. With a little patience and a sprinkle of joy, you’ll have these beautiful geode cookies ready to impress friends at your next gathering or even just for a sweet treat during the workweek. If you want to explore more about cookie decoration techniques, check out this decorating guide.
Enjoy every moment of your baking adventure!
Nutritional Information for Geode Cookies
When diving into the geode cookies recipe, understanding the nutritional content can help you indulge wisely. Each cookie packs a delightful punch, with approximately 150 calories per serving.
Caloric content per cookie
- Calories: 150 per cookie
- Serving Size: 1 cookie (weight may vary depending on dimensions)
Key nutritional breakdown
- Sugar: Around 10 grams, adding sweetness without overdoing it
- Fat: About 7 grams, mainly from butter, contributing to that rich flavor
- Protein: Approximately 2 grams, providing a slight boost to keep you energized
These cookies are perfect for occasional treats, especially when shared with friends or during a cozy gathering. Craving more insights on nutrition? Check out this resource for expert advice on balancing your diet without sacrificing taste!
FAQs about Geode Cookies
How do I store leftover geode cookies?
Storing leftover geode cookies is simple! Place them in an airtight container at room temperature for up to a week. If you want to keep them fresh even longer, you can refrigerate them, but let them come to room temperature before serving for that fresh-baked taste. If you notice that the sugar crystals are starting to lose their shine, simply pop the cookies back in the oven at a low temperature for a few minutes to give them a little pick-me-up!
Can I make the dough ahead of time?
Absolutely! One of the best things about this geode cookies recipe is its flexibility. You can prepare the dough a day in advance and store it in the fridge. Just make sure to wrap it tightly in plastic wrap. When you’re ready to bake, let the dough sit at room temperature for about 15–30 minutes before rolling it out. This makes it easier to work with and ensures that your cookies maintain their delicious texture.
What if I can’t find candy crystals?
If candy crystals are hard to come by in your area, don’t stress! You can create a beautiful geode effect by using rock sugar or even crushed hard candies. Simply break them into smaller pieces, and they’ll give you that colorful sparkle you desire. Alternatively, if you’re feeling adventurous, you can even try making your own candy crystals at home using sugar and water—this tutorial from Serious Eats is a great place to start!
Now that you’re armed with these answers, dive into creating your beautiful and delicious geode cookies!
Conclusion on Geode Cookies
Why you should give these a try!
If you’re looking to impress friends at your next gathering or simply want to indulge in a creative baking project, the geode cookies recipe is a delightful choice! Not only are they stunningly beautiful, but they also taste incredible. The combination of flavors, textures, and that sparkling, crystal-like appearance makes them a showstopper.
Baking these cookies can also be a fun bonding experience with friends or family, turning an ordinary day into something special. Plus, they’re flexible—you can customize the colors of the edible crystals to suit any celebration or personal taste. So why not take a break from the routine and whip up a batch? Trust me, they will be the highlight of any dessert table!
For even more tips on cookie decoration, check out resources like The Spruce Eats or Taste of Home. Happy baking!
PrintGeode Cookies Recipe: Indulge in an Easy, Stunning Treat
Learn how to make gorgeous geode cookies that are not only easy to create but are also a stunning treat for any occasion.
- Prep Time: 20 minutes
- Cook Time: 12 minutes
- Total Time: 32 minutes
- Yield: 24 cookies 1x
- Category: Desserts
- Method: Baking
- Cuisine: American
- Diet: Vegetarian
Ingredients
- 2 cups all-purpose flour
- 1 cup unsalted butter, softened
- 1 cup granulated sugar
- 2 large eggs
- 1 teaspoon vanilla extract
- 1 teaspoon baking powder
- 1/2 teaspoon salt
- 2 cups royal icing
- 1 cup edible glitter
- 1/2 cup food coloring (various colors)
Instructions
- Preheat the oven to 350°F (175°C).
- In a bowl, cream together the butter and sugar until light and fluffy.
- Add the eggs and vanilla extract, mixing until well combined.
- In another bowl, whisk together the flour, baking powder, and salt.
- Gradually add the dry ingredients to the wet ingredients, mixing until just combined.
- Roll the dough into small balls and place them on a baking sheet.
- Bake for 10-12 minutes or until edges are lightly golden.
- Take cookies out and let them cool.
- Once cooled, use royal icing to decorate the cookies and add edible glitter for the geode effect.
- Let the decoration set before serving.
Notes
- Experiment with different colors of food coloring for a unique look.
- Store cookies in an airtight container to maintain freshness.
Nutrition
- Serving Size: 1 cookie
- Calories: 150
- Sugar: 10 grams
- Sodium: 50 mg
- Fat: 8 grams
- Saturated Fat: 5 grams
- Unsaturated Fat: 2 grams
- Trans Fat: 0 grams
- Carbohydrates: 18 grams
- Fiber: 0 grams
- Protein: 2 grams
- Cholesterol: 30 mg
Keywords: Geode Cookies, Dessert Recipes, Easy Cookies