Outline for Christmas Bars
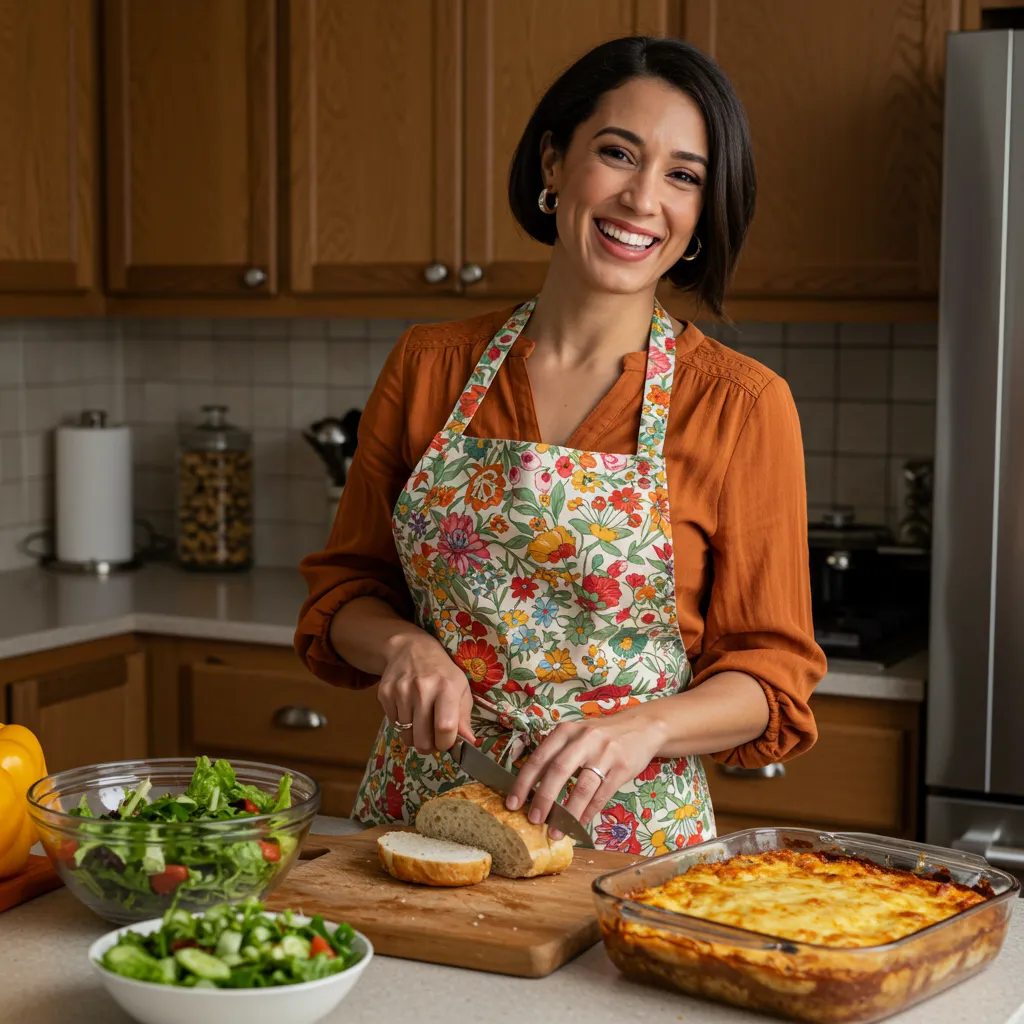
When the holiday season rolls around, everyone starts to think about festive snacks and cozy gatherings. If you’re anything like me, you love to whip up something sweet that pairs perfectly with a hot cup of cocoa or spiced apple cider. Enter Christmas bars! These delightful treats are not only a festive addition to any dessert table but also incredibly easy to prepare and perfect for sharing with friends and family.
Understanding the Appeal of Christmas Bars
Before we dive into the delightful recipes, let’s chat about what makes Christmas bars so special. They come in countless varieties, allowing you to mix and match flavors, textures, and colors. From chewy cookie bars to rich, fudgy delights, the possibilities are nearly endless. Importantly, they are easy to slice and serve, minimizing stress during those bustling holiday parties.
According to a recent survey by the American Bakers Association, over 75% of Americans purchase or make baked goods during the holiday season. It’s no wonder that bars are among the most popular choices! They are portable, easy to share, and perfect for both casual and formal gatherings.
Essential Ingredients for Holiday Magic
To prepare your Christmas bars, you’ll need some staple ingredients that can easily be found in your pantry or at the store. Here’s a quick rundown:
- Flour: All-purpose flour is key for structure.
- Sugar: A mix of granulated and brown sugar adds sweetness and richness.
- Butter: Always opt for unsalted; this allows you to control the saltiness of your bars.
- Eggs: These help bind everything together.
- Flavorings: Consider vanilla extract, almond extract, or spices like cinnamon and nutmeg for that holiday flair.
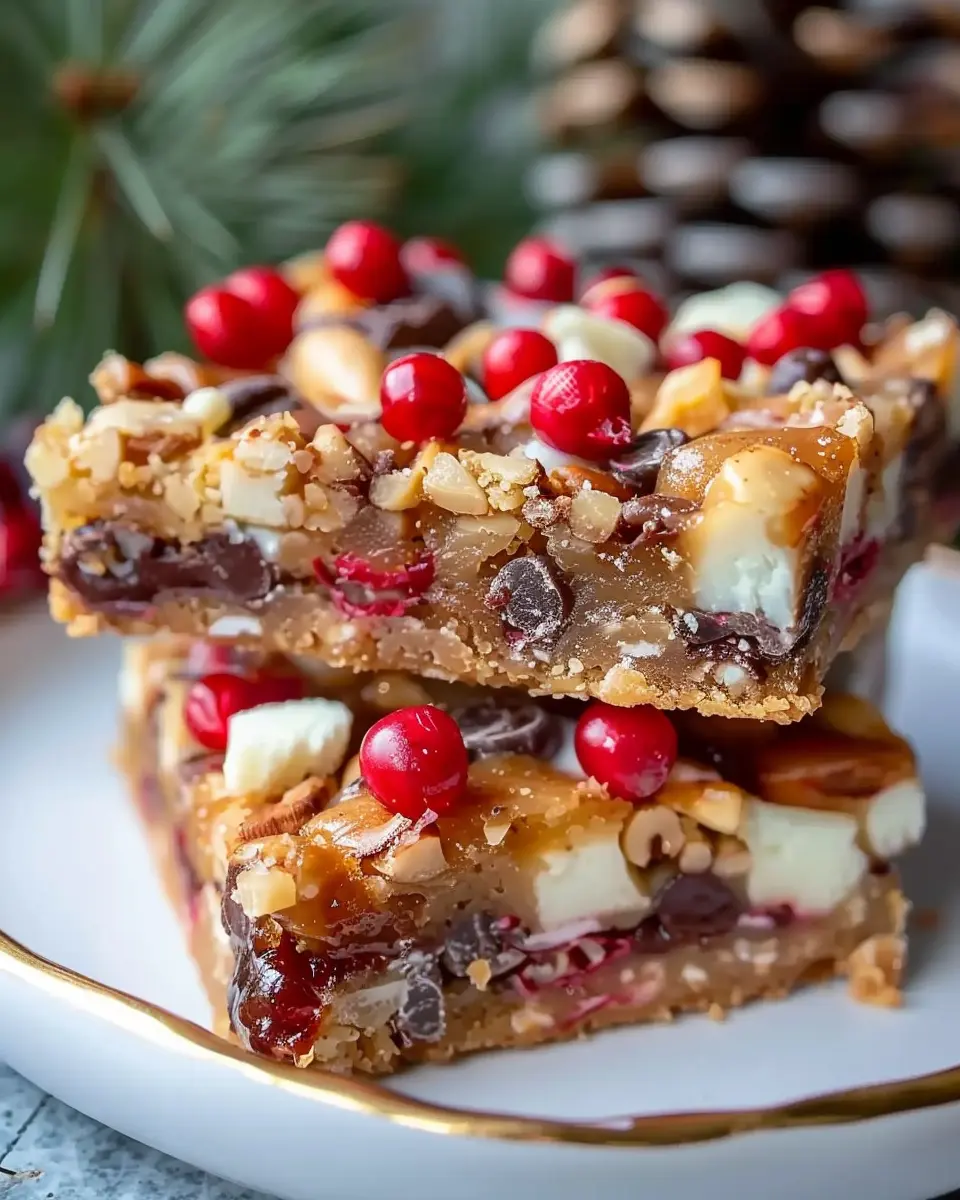
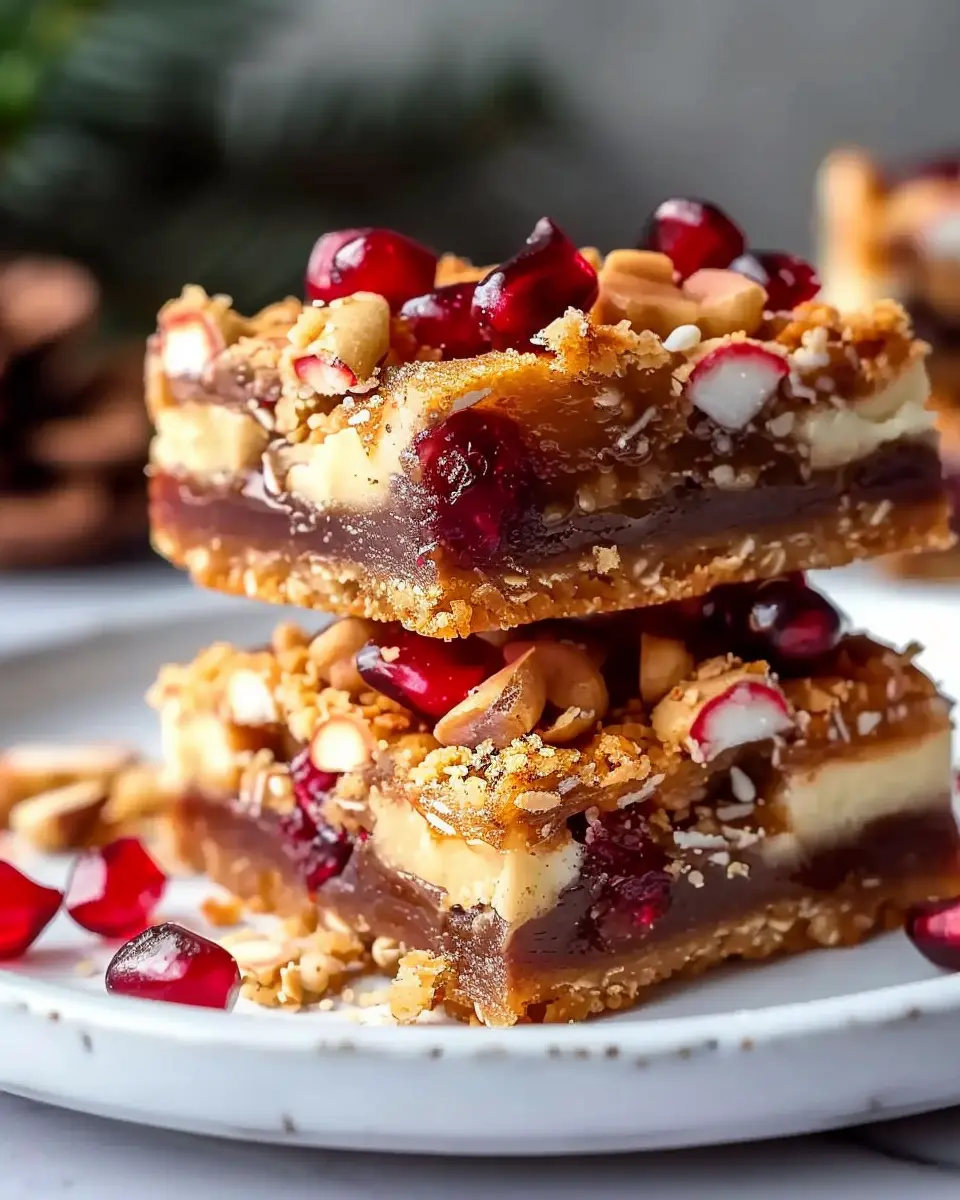
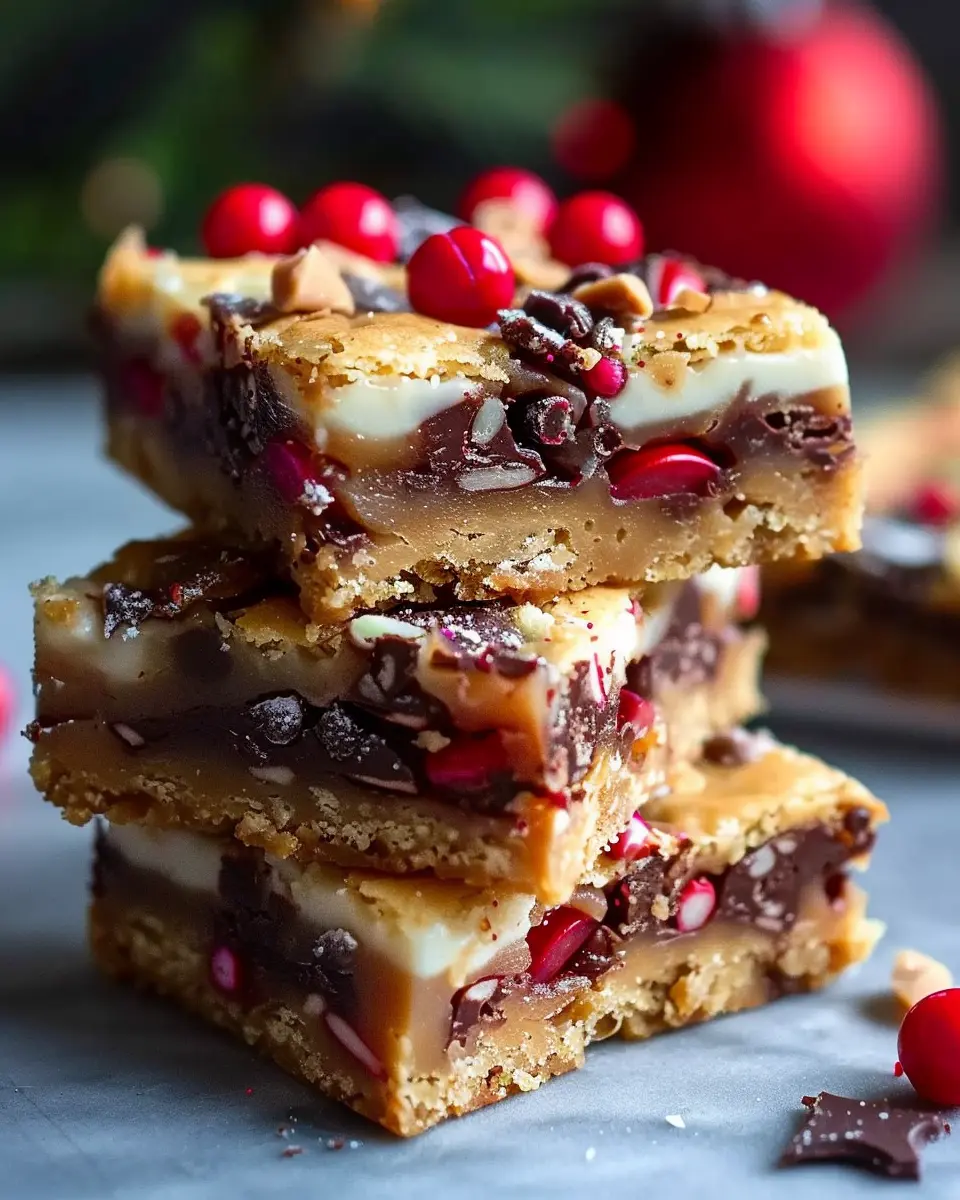
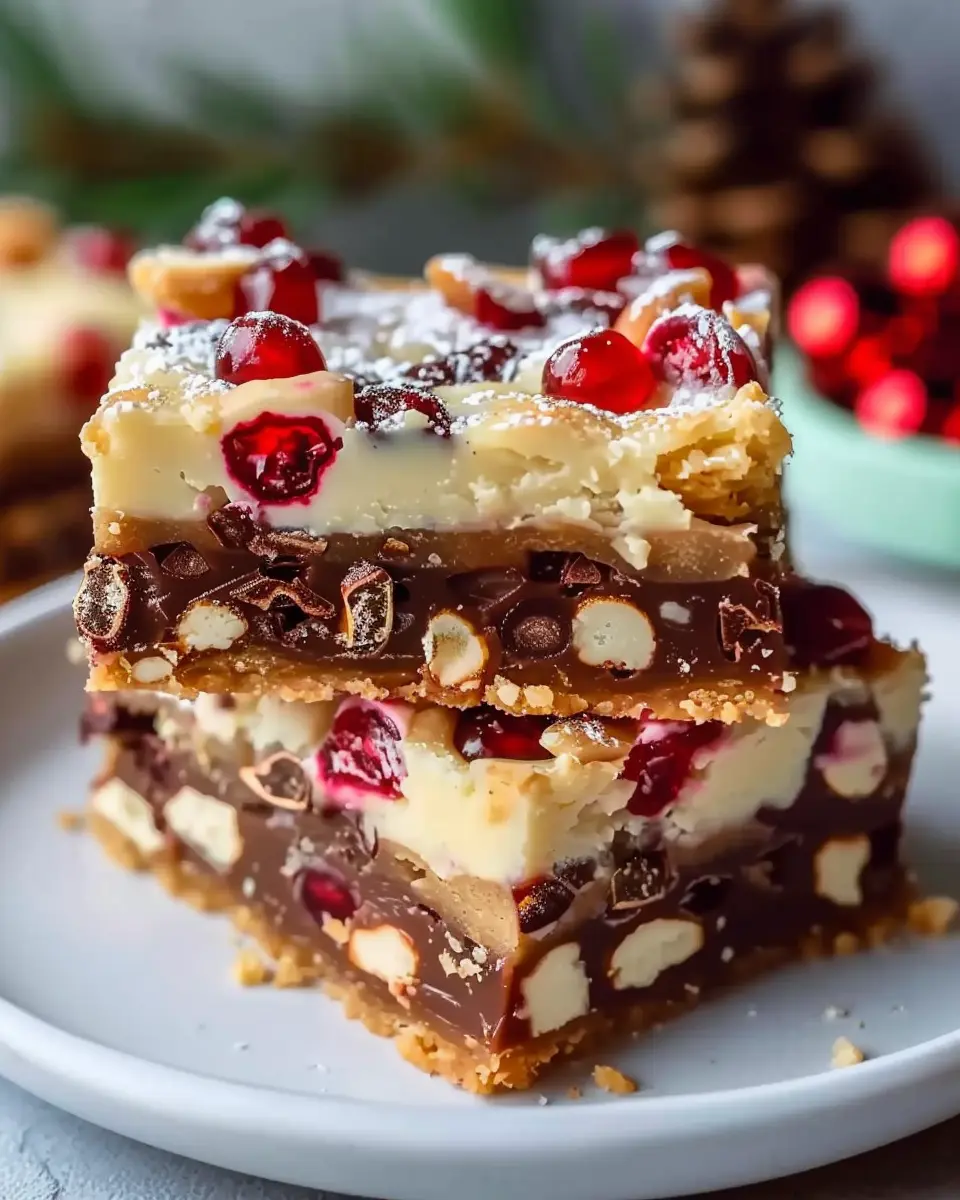
- Add-ins: Chocolate chips, dried fruits, nuts, and even Turkey Bacon or Chicken Ham can transform your bars into festive delights!
A Step-by-Step Journey to Perfect Christmas Bars
Let’s explore how to prepare these delightful treats with some general steps that can be applied to virtually any bar recipe.
-
Preheat Your Oven: Always start by preheating your oven; a hot oven ensures even baking. Generally, you’ll want to set it to around 350°F (175°C).
-
Prepare Your Pan: Lining your baking pan with parchment paper makes for easy removal later on. Plus, it helps to keep your bars from sticking!
-
Mix the Dry Ingredients: In a bowl, combine your flour, baking powder, and any spices. This step ensures even distribution of the leavening agents.
-
Cream Butter and Sugar: In a separate bowl, beat the softened butter with sugar until it’s light and fluffy. This is where your bars gain a rich flavor.
-
Add Wet Ingredients: Incorporate the eggs and extracts into the butter mixture. Stir well until everything is combined.
-
Combine Mixtures: Gradually add your dry ingredients to the wet mixture. Make sure not to overmix; you want your bars to be tender and not tough.
-
Fold in Add-ins: Lastly, gently fold in any add-ins like chocolate, dried fruits, or even finely chopped Turkey Bacon or Chicken Ham for a savory twist.
-
Bake: Pour the batter into your prepared pan, spreading it evenly. Bake in your preheated oven for around 20-30 minutes, or until a toothpick inserted in the center comes out clean.
-
Cool and Slice: After baking, let the bars cool in the pan for a bit before transferring them to a wire rack to cool completely. Once cooled, slice them into your desired portion sizes.
Want to learn more about baking techniques? Check out King Arthur Flour for expert tips and detailed guides on getting the best results in your holiday baking!
Delicious Variations of Christmas Bars
Once you’ve mastered the basic Christmas bars formula, the fun really begins! Here are a few variations that will cater to different tastes and dietary preferences.
Classic Holiday Flavors
- Peppermint Bark Bars: Combine crushed candy canes with dark chocolate for a refreshing twist.
- Gingerbread Bars: Infuse your bars with ginger, molasses, and spices to capture the essence of gingerbread cookies.
Nutty Delights
- Pecan Pie Bars: Use a buttery pecan filling over a cookie base for that classic pecan pie taste.
- Nutty Brownie Bars: Add walnuts or pecans to your brownie mixture for a satisfying crunch.
Fruity Treats
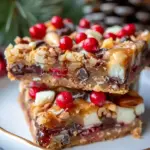
- Cranberry Orange Bars: Incorporating tart cranberries and fresh orange zest gives these bars a bright flavor profile.
- Apple Cinnamon Bars: Perfect for a fall-inspired treat, these bars offer a cozy combination of apples and warm spices.
Feeling inspired? If you’re looking for even more ideas, check sites like Food Network or Bon Appétit for tried-and-true recipes and personal stories from fellow bakers.
Tips for Baking Success
As you prepare to create your Christmas bars, here are a few tips that can help you achieve baking success:
- Quality Ingredients Matter: Opt for high-quality chocolate and fresh spices for the best flavor in your bars.
- Experiment with Textures: Don’t be afraid to mix in different nuts or dried fruits for added texture.
- Store Properly: Keep your bars in an airtight container to maintain their freshness. Most bars last about a week, but some varieties freeze really well for up to three months!
Create a Festive Atmosphere
Baking is so much more than just following a recipe—it’s also about creating joyful memories! Gather your friends or family for a weekend baking session filled with laughter, stories, and, of course, plenty of taste testing. You’ll not only enjoy the fruits of your labor but also strengthen bonds over shared experiences.
The Joy of Sharing
One of the best parts of making Christmas bars is sharing them with others. Whether you’re gifting them in cute holiday bags, bringing them to a potluck, or just enjoying them with a cup of cider on a cold evening, the joy of spreading sweetness is truly the essence of the season. If you’re looking for ways to incorporate charity into your holiday giving, consider baking batches for local shelters or neighbors in need.
Conclusion: Your Ultimate Baking Adventure Awaits
So there you have it! An outline for crafting your own delightful Christmas bars. Whether you stick to the classics or venture out to create your very own signature version, the key is to have fun with it. Let the holiday spirit guide your baking adventures, and don’t forget to share your creations on social media with fellow bakers! Happy baking, and may your holiday season be filled with sweet moments!
Introduction to Christmas Bars
What are Christmas bars and why are they special?
Christmas bars are delicious, festive treats that combine the best flavors of the holiday season into a convenient, easily shareable format. Think of them as the sweet love child of brownies and cookies, often packed with seasonal ingredients like nuts, dried fruits, chocolate, and spices. These bars come in various forms—some are rich and fudgy, while others are light and crumbly. Whether you’re enjoying them at a holiday party or gifting them to friends, these bars bring joy and warmth to the season.
So, what truly makes Christmas bars special? For many, it’s the nostalgia that comes with baking. These recipes often have family traditions attached, passed down through generations who celebrated joyous occasions around a warm oven. Plus, the color and festivity of these treats can brighten any table, making them a perfect centerpiece for holiday gatherings. Check out more about holiday baking traditions in this informative article by the National Christmas Tree Association.
The joy of homemade treats during the holiday season
There’s something uniquely satisfying about making your own Christmas bars. The act of baking is an opportunity to express love and creativity, turning simple ingredients into something spectacular. Plus, the aroma of fresh-baked goodies filling your home can evoke feelings of comfort and happiness. According to a study by the American Psychological Association, engaging in baking can boost your mood and evoke warmer memories.
When you decide to whip up a batch of Christmas bars, you’re not just creating a dessert; you’re crafting memories.
- Gather your friends or family around the kitchen to join in on the fun.
- Experiment with different flavors—add a sprinkle of cinnamon, a handful of cranberries, or a touch of peppermint for that holiday twist.
With so many variations, you can personalize them to suit your taste or even make a themed platter. Want more inspiration for your holiday treats? Consider browsing the recipes on Food Network.
In a season filled with hustle and bustle, taking the time to create these homemade delights is a wonderful way to slow down, connect with loved ones, and spread holiday cheer. So roll up your sleeves, grab those baking pans, and let’s get started on crafting some memorable Christmas bars!
Ingredients for Christmas Bars
Essential ingredients for festive bars
When it comes to making delicious Christmas bars, having the right ingredients is key. For a classic base, you’ll need:
- Butter: A rich flavor foundation.
- Brown sugar: For sweetness and moisture.
- All-purpose flour: The structure of your bars.
- Baking powder: To help them rise.
- Eggs: For binding and richness.
Don’t forget the spices—cinnamon, nutmeg, and even ginger can add that warm, festive touch that makes your bars unique.
Optional mix-ins for customization
To elevate your Christmas bars, think about adding some fun mix-ins! These not only enhance flavor but also make your treats special. Some popular options include:
- Chopped nuts: Walnuts or pecans provide a delightful crunch.
- Dried fruits: Consider cranberries, apricots, or even cherries for natural sweetness.
- Chocolate chips: Dark, white, or milk chocolate for a decadent twist.
- Turkey bacon or chicken ham: For an unexpected savory touch.
These ingredients allow you to customize your Christmas bars to fit your taste or even use up leftover holiday goodies. So grab your mixing bowl and let’s get festive!
If you’d like to explore more about holiday baking, check out BBC Good Food for a wealth of tips and tricks.
Step-by-step Preparation of Christmas Bars
Making Christmas bars is one of the joys of holiday baking that brings warmth, delicious aromas, and a bit of nostalgia into our lives. Whether you’re planning a cozy family gathering or preparing sweet gifts for friends, these bars are your ticket to spreading cheer. Let’s dive into the delightful process of making these festive treats.
Preheat the Oven
Before you get your hands into mixing dough, it’s essential to preheat your oven. Set it to 350°F (175°C). This ensures that your Christmas bars bake evenly from the moment you put them in. A well-heated oven can make all the difference in achieving that perfect texture—soft and chewy on the inside with a hint of crispiness on the outside. While this is happening, you can gather your ingredients!
Mix Dry Ingredients
In a large mixing bowl, start by whisking together your dry ingredients to ensure even distribution. This usually includes:
- 2 cups of all-purpose flour
- 1 teaspoon of baking powder
- 1/2 teaspoon of baking soda
- 1/2 teaspoon of salt
- 1 teaspoon of ground cinnamon
- 1/2 teaspoon of nutmeg (optional for an extra holiday touch)
Combining these dry elements at the beginning allows all of that wonderful flavor and leavening power to work together beautifully. By the way, did you know that the American Chemical Society has fantastic resources on baking science? It’s pretty fascinating how chemistry plays a role in the perfect batch!
Add Wet Ingredients
Once your dry ingredients are well-mixed, it’s time to introduce the wet ingredients. In a separate bowl, you’ll want to cream together:
- 3/4 cup of softened butter
- 1 cup of brown sugar
- 1/2 cup of granulated sugar
- 2 large eggs
- 1 teaspoon of vanilla extract
Blend these together until you achieve a light and fluffy mixture. This stage is where the magic begins. The combination of sugars and butter creates that delightful richness that is quintessential to any good Christmas bar. If you’re looking for a healthier alternative, consider using unsweetened applesauce in place of some of the butter.
Fold in Mix-ins
Now comes the fun part—folding in your favorite mix-ins! Whether you gravitate toward chocolate, nuts, or dried fruits, the options are endless. Some popular choices include:
- 1 cup of chocolate chips (semisweet or white)
- 1/2 cup of chopped nuts (walnuts or pecans)
- 1/2 cup of dried cranberries or cherries
- 1/2 cup of mini marshmallows
Gently incorporate these into your batter with a spatula. This is where creativity shines; customize your bars with whatever flavors and textures speak to you.
Spread Mixture and Bake
Next, you’ll want to spread your mixture into a greased or parchment-lined baking pan—typically an 8×8 or 9×13-inch dish works well. Make sure to even it out so that it bakes uniformly. Pop the pan into the preheated oven and let the Christmas bars bake for about 25-30 minutes, or until a toothpick inserted in the center comes out clean. The aroma wafting from your oven at this stage will have your family peeking in with excitement.
Cool and Cut
Once your bars are done baking, remove them from the oven and allow them to cool in the pan for about 10-15 minutes. After that, transfer them to a wire rack to cool completely. Patience is key here, as cutting into them while they are still warm might lead to a crumby mess! After they’ve cooled, you can slice them into squares or rectangles, depending on your preference.
Christmas bars are versatile, so feel free to experiment with presentation ideas—drizzle them with icing or dust them with powdered sugar for an extra festive touch. They also make the perfect addition to your holiday dessert platter!
Happy baking, and may your Christmas bars bring joy not just to you, but also to everyone you’re sharing them with!
Variations on Christmas Bars
Christmas is a time for celebration, and what better way to share joy than with delicious Christmas bars? These delightful treats are perfect for every dietary preference, ensuring everyone can join in the festivities.
Nut-free Christmas Bars
For guests with nut allergies, creating nut-free Christmas bars is easy and rewarding. Substitute nut butters with sunbutter or pumpkin seed butter. You can also enhance flavor with spices like cinnamon and vanilla. With straightforward swaps, you can craft a treat that’s both safe and scrumptious.
A Gluten-free Option for Holiday Sharing
Hosting gluten-free friends? No problem! Use gluten-free oats and a mix of almond flour and coconut flour for your base to ensure they’re just as delicious. Many gluten-free baking blends on the market can provide a perfect alternative without compromising texture or taste.
Vegan Adaptation for Inclusive Festivities
Want to make your Christmas bars vegan? Simply replace eggs with flax eggs (1 tablespoon of flaxseed meal mixed with 2.5 tablespoons of water per egg). Use agave or maple syrup instead of honey for sweetness. These minor tweaks ensure that everyone can indulge without any animal products.
Mint Chocolate Twist for a Refreshing Flavor
Give your Christmas bars a festive twist by adding some peppermint extract and chocolate chips. This combination not only smells heavenly but also adds a refreshing zing that contrasts beautifully with the rich, sweet base of the bars.
Fruit and Nut Medley for Added Texture
For those who love variety, incorporating dried fruits (think cranberries or apricots) and a mix of seeds can elevate your Christmas bars. This adds both texture and flavor, making each bite a delightful experience.
For even more inspiration, check out Healthline’s article on healthy dessert alternatives to discover how to make these bars a nutritious treat that everyone can enjoy!
Cooking Tips and Notes for Christmas Bars
Importance of Ingredient Quality
When crafting delicious Christmas bars, the quality of your ingredients makes all the difference. Opt for organic or high-quality chocolates and nuts to elevate the flavor. Fresh, real butter instead of margarine can greatly enhance texture. As the saying goes, “you get what you pay for,” and this rings particularly true in baking. Check out this guide on ingredient selection for more insights.
Storing Leftovers for Freshness
To keep your Christmas bars fresh, store them in an airtight container at room temperature or in the fridge if it’s warm. They can last up to a week. If you’ve made a large batch, consider freezing them. Just remember to separate layers with parchment paper to avoid sticking. Did you know you can revive a thawed bar in the oven for a few minutes? It’s like bringing holiday magic back!
Common Baking Mistakes to Avoid
Here are a few pitfalls to watch for when making your Christmas bars:
- Skipping the Preheat: Always preheat your oven! This ensures even baking for your bars.
- Overmixing the Batter: Don’t overdo it! Mix just until the ingredients are combined to keep your bars tender.
- Ignoring the Cooling Time: Allow your bars to cool in the pan before cutting them. This helps achieve clean, beautiful slices.
Keeping these tips in mind will help you whip up the perfect batch of festive bars this holiday season!
Serving Suggestions for Christmas Bars
Pairing Ideas with Beverages
When it comes to enjoying Christmas bars, think outside the usual beverage box! These sweet treats can perfectly complement a range of drinks. Try pairing your bars with:
- Spiced hot chocolate: The warmth of spices enhances the flavors in your bars.
- Herbal teas: Chamomile or peppermint provide a soothing contrast.
- Sparkling water: A splash of citrus in sparkling water can brighten the experience without overpowering the taste.
For more festive drink ideas, consider checking out sites like The Spruce Eats.
Presenting Bars in a Festive Way
Make your Christmas bars the centerpiece of your dessert table! Slice them into bite-sized pieces and arrange on a decorative platter. Add a sprinkle of powdered sugar or edible glitter on top for that holiday sparkle. You could even use cute holiday-themed paper liners for individual servings and tie them with twine for an extra touch!
Optimal Serving Temperatures for Enjoyment
For the best flavor experience, serve your Christmas bars slightly warm or at room temperature. If you’ve made them with chocolate or caramel, a gentle heat can enhance their gooey textures. If you’ve refrigerated them, let them sit out for about 15–20 minutes before serving. This ensures a delightful balance between creamy and chewy that your guests will adore!
Time Breakdown for Christmas Bars
Preparation Time
Making Christmas bars is a breeze! You’ll need about 15 minutes to gather your ingredients, mix everything together, and set the batter in the baking pan. It’s a super fun process that often brings back memories of holiday baking with loved ones. If you’re short on time, you can even prep the ingredients the night before!
Baking Time
Once your batter is ready, pop it in the oven for approximately 25-30 minutes. You’ll want to keep an eye on them—they’ll turn a lovely golden brown when they’re done. Just imagine the delightful aroma filling your kitchen!
Total Time Required
By the end of it all, you’re looking at around 45 minutes to 1 hour total for these delicious Christmas bars. That’s hardly any time to spend for such a rewarding and festive treat! Perfect for when you need something scrumptious to impress during the holiday season. If you’re interested in more quick recipes, you might like checking out this guide for ideas.
So, are you ready to create some holiday magic? Let’s get started!
Nutritional Facts for Christmas Bars
Calories per serving
When you indulge in these delicious Christmas bars, you can expect around 200 calories per serving. Perfect for a holiday treat without overindulging! Of course, portion sizes matter, but it’s always great to enjoy a little sweetness during the festive season.
Key nutrient breakdown
These Christmas bars pack a punch in flavor and nutrition. Each serving includes:
- Fat: Approximately 10g, primarily from healthy sources
- Carbohydrates: About 25g, providing needed energy
- Protein: Roughly 3g, thanks to added nuts or seeds
With a blend of whole ingredients, you’ll find fiber and essential vitamins too, making these bars a guilt-free holiday snack.
Considerations for special diets
These Christmas bars can easily fit into various dietary needs. For gluten-free friends, swap traditional flour for almond or coconut flour. Vegan options? Substitute eggs with applesauce or flaxseed. And for those counting calories or managing diabetes, you can use stevia or other low-calorie sweeteners. It’s about enjoying the season while being mindful of your choices!
For more insights on making healthier holiday treats, check this Nutritional Guide from the Academy of Nutrition and Dietetics.
FAQs about Christmas Bars
As you prepare to whip up a batch of delectable Christmas bars, you might have a few questions about how to best enjoy and store these delightful treats. Let’s dive into some common queries to ensure your festive baking goes smoothly!
How can I store Christmas bars for maximum freshness?
To keep your Christmas bars tasting their best, store them in an airtight container at room temperature. If you’re dealing with a particularly humid climate, you might want to place them in the fridge. Make sure to separate the layers with wax paper to prevent sticking. Under proper conditions, they can stay fresh for about a week, but let’s be honest—once family and friends get a taste, they probably won’t last that long!
Can I freeze Christmas bars for later enjoyment?
Absolutely! Freezing is a fantastic option if you’re planning to make your Christmas bars ahead of time. Cut them into pieces and wrap each piece tightly in plastic wrap, then place them in a freezer-safe bag or container. They can be stored for up to three months. When you’re ready to indulge, just let them thaw overnight in the refrigerator or at room temperature for a few hours.
What are some popular mix-ins for Christmas bars?
The beauty of Christmas bars is their versatility! You can add a range of mix-ins to suit your taste. Here are a few popular options:
- Chocolate chips (classic and always a hit)
- Chopped nuts (walnuts or pecans add a nice crunch)
- Dried fruits (cranberries or apricots introduce a sweet, chewy texture)
- Spices (like nutmeg or cinnamon for that holiday warmth)
- Toffee bits (for an unexpected caramel flavor)
Feel free to get creative with your combinations or check out our guide on mix-ins for more ideas!
For additional tips on storing baked goods, you can visit Food Storage & Preservation Techniques for expert advice. Happy baking!
Conclusion on Christmas Bars
Recap of the joy of making and sharing Christmas bars
Creating Christmas bars is not just about baking; it’s about fostering connections. The sweet aroma that fills your kitchen conjures up memories, laughter, and the warmth of the holiday spirit. Sharing these delightful treats with friends and family can enhance your celebrations and create lasting traditions. Whether it’s a family recipe or a new creation, each bar brings a unique flavor to your festive gathering.
Encouragement to start this holiday tradition
If you haven’t yet incorporated Christmas bars into your holiday routine, now is the perfect time! Start your own tradition by experimenting with different flavors and textures. Who knows? Your Christmas bars might just become the highlight of your family’s holiday celebrations. So don’t wait—roll up your sleeves, gather your loved ones, and indulge in the joy of baking these sweet treats together.
For some inspiration, check out this guide on holiday baking traditions or explore ideas for custom Christmas bar recipes at Epicurious. Happy baking!
PrintChristmas bars: Indulgent Treats to Brighten Your Holiday Festivities
Indulge in these delicious Christmas bars that are perfect for any holiday gathering. With rich flavors and festive decorations, these treats will surely brighten your celebrations.
- Prep Time: 20 minutes
- Cook Time: 25 minutes
- Total Time: 45 minutes
- Yield: 16 bars 1x
- Category: Desserts
- Method: Baking
- Cuisine: American
- Diet: Vegetarian
Ingredients
- 2 cups crushed graham crackers
- 1 cup unsweetened cocoa powder
- 1 cup powdered sugar
- 1 cup unsalted butter, melted
- 1 cup chocolate chips
- 1 cup chopped nuts
- 1 teaspoon vanilla extract
- 1 cup mini marshmallows
Instructions
- Preheat your oven to 350°F (175°C).
- In a large bowl, combine graham crackers, cocoa powder, and powdered sugar.
- Add the melted butter, chocolate chips, nuts, and vanilla extract. Stir until well combined.
- Fold in the mini marshmallows.
- Pour the mixture into a greased baking dish and press down evenly.
- Bake for 20-25 minutes or until set.
- Allow to cool before cutting into bars.
Notes
- For extra holiday flair, top with festive sprinkles or crushed peppermint.
- These bars can be stored in an airtight container for up to one week.
Nutrition
- Serving Size: 1 bar
- Calories: 250
- Sugar: 20g
- Sodium: 150mg
- Fat: 15g
- Saturated Fat: 8g
- Unsaturated Fat: 5g
- Trans Fat: 0g
- Carbohydrates: 30g
- Fiber: 1g
- Protein: 3g
- Cholesterol: 30mg
Keywords: Christmas bars, holiday treats, festive desserts