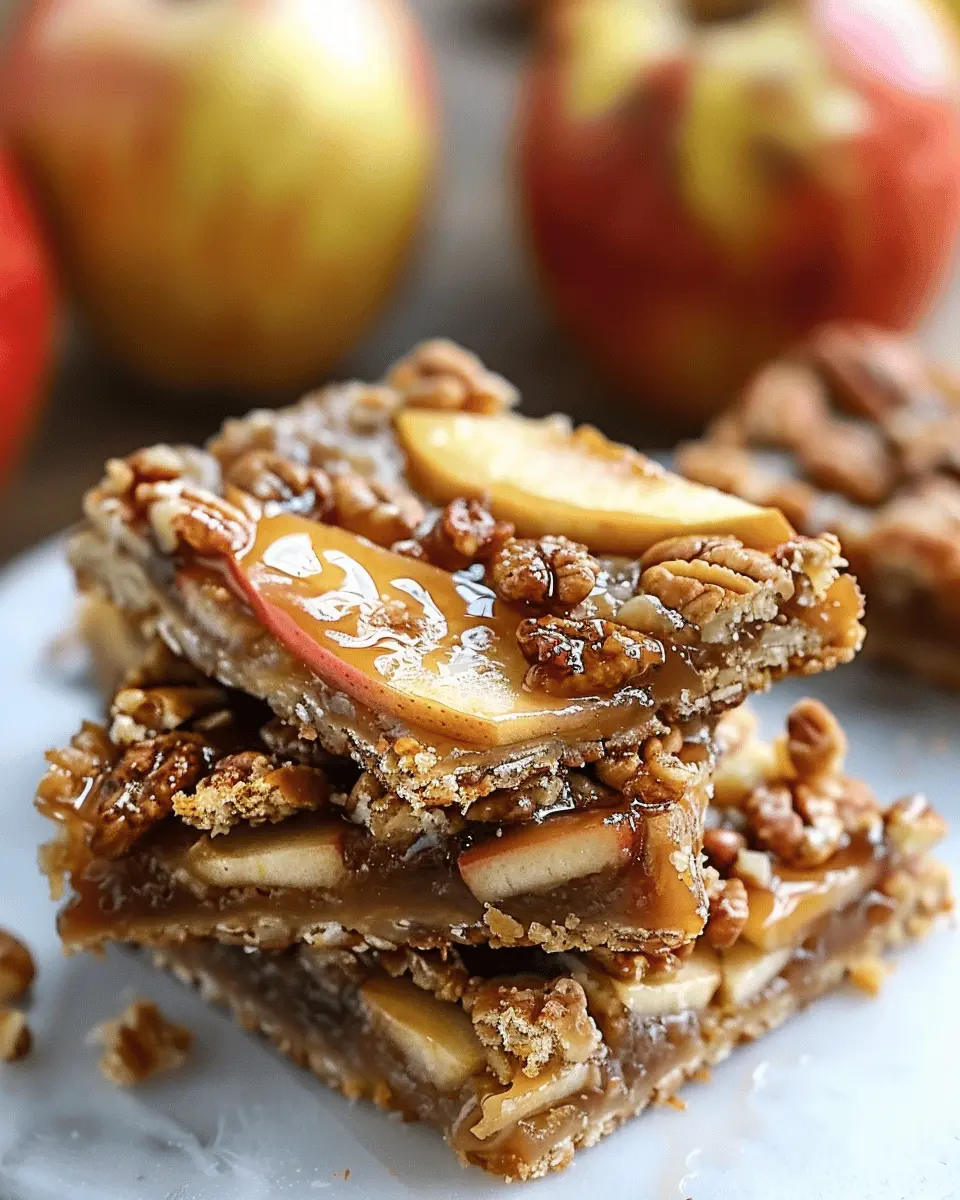
Introduction to Homemade Apple Bars
When it comes to desserts that tickle your taste buds and remind you of cozy evenings, homemade apple bars are a must-try. These delightful treats are not just delicious; they’re also simple to whip up, making them perfect for your busy lifestyle. Whether you’re a novice in the kitchen or a seasoned pro, the appeal of warm, spiced apples nestled in a buttery crust is hard to resist.
Why Apple Bars Deserve a Spot in Your Recipe Collection
Apple bars blend convenience with comfort, and let’s be honest—they’re a crowd-pleaser. Imagine hosting a get-together and serving up these delightful squares, with their layers of tender apples, cinnamon, and sugar that waft in the air. Your guests will be clamoring for the recipe, and you’ll be the star of the show!
Consider these reasons for making apple bars a staple in your dessert repertoire:
- Versatile and Customizable: You can tailor your apple bars to include various nuts, dried fruits, or even a splash of caramel. The possibilities are endless!
- Perfect for Any Occasion: Whether it’s a family gathering, a cozy night in, or just a sweet treat to enjoy, apple bars fit right in. You can even package some up as a thoughtful gift for friends or coworkers.
- Healthy Alternatives: They can be made lighter by using whole grains or reducing the sugar content. Plus, apples are loaded with nutrients—fiber, vitamins, and antioxidants—so you can enjoy them without major guilt.
If you’re looking for inspiration, check out The Kitchn’s Apple Bar Recipe for a fantastic base to work from. Plus, the joy of baking with fresh apples means you can explore various flavors and textures, making each batch unique.
So, whether you’re looking to elevate your dessert game or simply indulge in some homemade goodness, apple bars are the way to go. With each bite, you’ll savor the warmth and nostalgia that comes with this cherished treat. So grab your apron, and let’s start baking those delicious apple bars!
Ingredients for Apple Bars
When it comes to crafting the perfect apple bars, the ingredients you choose can make all the difference. Let’s dive into what you’ll need to create these delicious treats.
Core Ingredients
- Apples – About 4 medium-sized, firm apples, like Granny Smith or Honeycrisp, will give your bars the ideal tartness and sweetness.
- Brown Sugar – For that rich caramel flavor, you’ll want around 1 cup of packed brown sugar.
- All-Purpose Flour – A generous 2 cups will create a lovely base for your bars.
- Butter – Use ½ cup of unsalted butter, melted, to bind everything together beautifully.
Flavor Enhancers
- Ground Cinnamon – Just 1-2 teaspoons will elevate the flavor profile.
- Vanilla Extract – A splash (about 1 teaspoon) adds warm notes that complement the apples perfectly.
- Baking Powder – Make sure to include 1 teaspoon to give your bars that delightful crumb.
Optional Add-Ins
- Nuts – Chopped walnuts or pecans can add a delightful crunch.
- Raisins – A handful of raisins can introduce a pleasant chewiness.
These ingredients are straightforward to find; check out your local grocery store’s website for availability. By mixing high-quality apples with just the right spices, your apple bars will be a hit at any gathering, reminiscent of home-baked goodness.
Ready to gather your ingredients? Let’s get baking!
Preparing Apple Bars
If you’re yearning for a delightful dessert that captures the essence of autumn, look no further than homemade apple bars. This recipe is not only straightforward but also offers a comforting taste that will surely impress your friends and family. Let’s guide you step-by-step in the preparation, so you can whip up these delicious treats with ease.
Gather Your Materials
To start your journey to delicious apple bars, it’s essential to have all your materials in place. Here’s what you’ll need:
-
For the crust:
-
1 cup all-purpose flour
-
1/4 cup granulated sugar
-
1/2 cup unsalted butter, softened
-
1/2 teaspoon baking powder
-
A pinch of salt
-
For the apple filling:
-
3 medium apples (Granny Smith or Honeycrisp work wonderfully)
-
1/2 cup brown sugar
-
1 teaspoon cinnamon
-
1 tablespoon lemon juice
-
1 tablespoon cornstarch
-
For the topping:
-
1/2 cup oats
-
1/4 cup chopped nuts (optional)
-
1/4 cup butter, melted
-
1/4 cup flour
-
1/4 teaspoon cinnamon
Gathering these ingredients ahead of time not only simplifies the cooking process but also allows you to enjoy the experience without the pressure of searching for items in the middle of preparation, which everyone can relate to.
Create the Crust
Now that you have your materials ready, let’s dive into making the crust.
- In a mixing bowl, combine the flour, sugar, baking powder, and salt. Mix them well.
- Add the softened butter and blend until the mixture turns crumbly.
- Press this crust mixture evenly into the bottom of a greased baking dish (about 8×8 inches should work perfectly).
What you’re aiming for here is a solid base that will complement the sweet apple filling beautifully. If you haven’t noticed yet, sometimes the crust is that unsung hero of the dessert, giving each bite a satisfying crunch.
Prepare the Apple Filling
While your crust is setting, it’s time to prepare the apple filling.
- Peel, core, and slice your apples into thin segments. This will ensure that they cook evenly.
- In a separate bowl, toss the apple slices with brown sugar, cinnamon, lemon juice, and cornstarch until every piece is well-coated.
Why the lemon juice? It enhances the flavor and keeps the apples from browning too quickly—an essential tip if you want your apple bars to look as good as they taste.
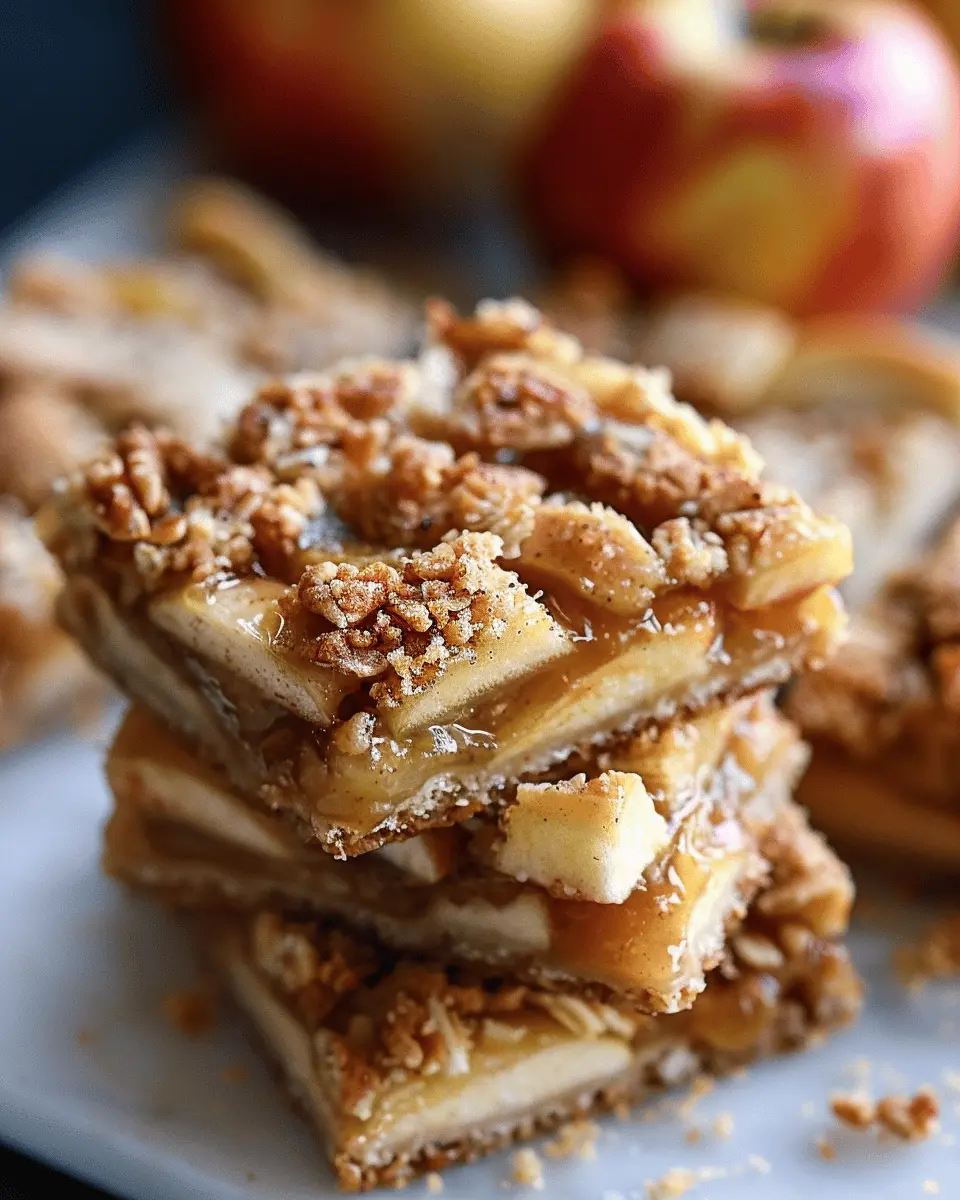
Combine Layers
Next up, it’s time to assemble your layers.
- Spoon the apple filling over the prepared crust, spreading it evenly.
- In a small bowl, mix together all the topping ingredients (oats, nuts, melted butter, flour, and additional cinnamon) until crumbly.
- Sprinkle this mixture generously over the apple filling.
This layered effect not only offers a vibrant contrast but also guarantees that each bite will be a perfect balance of flakiness and fruitiness.
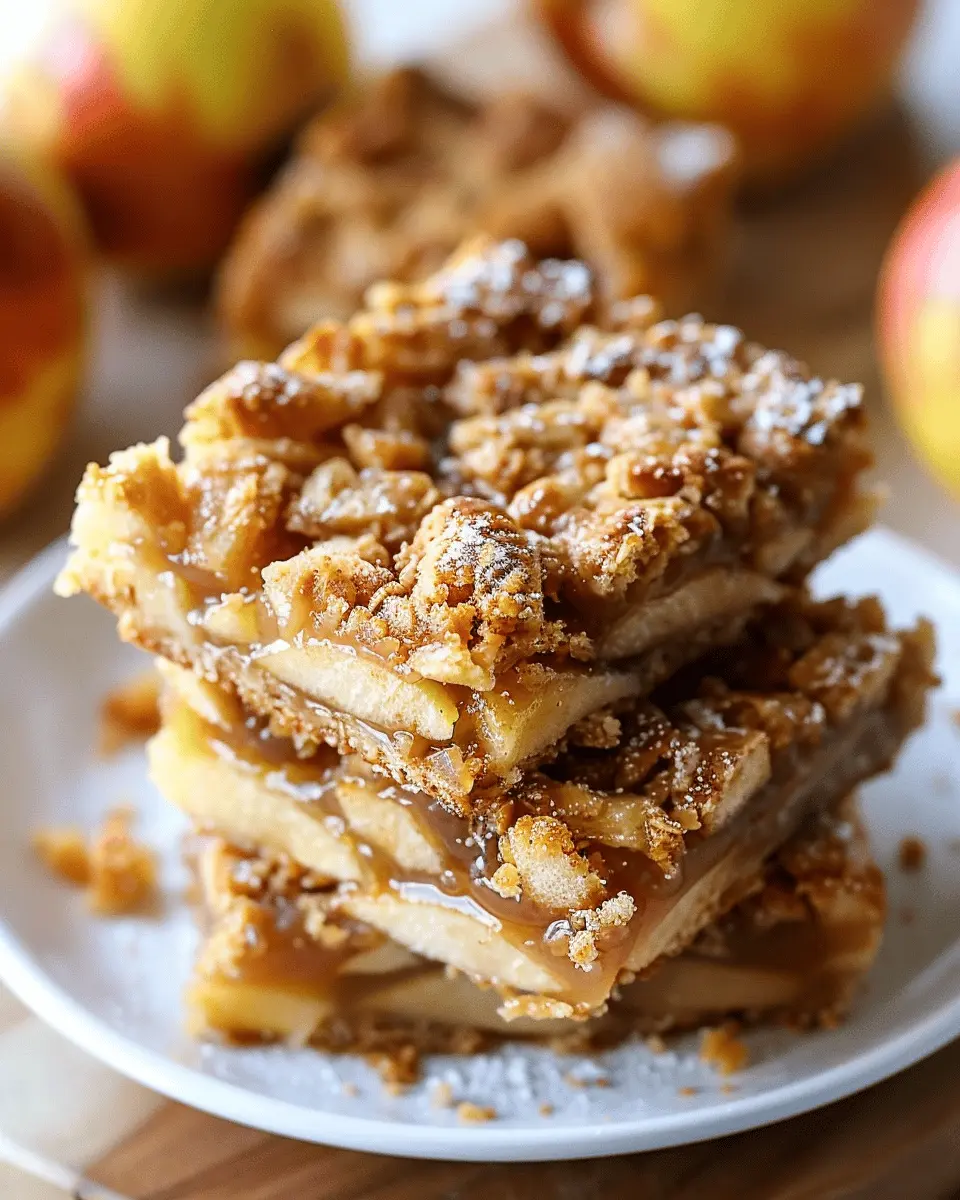
Bake to Perfection
Now for the final touch—baking!
- Preheat your oven to 350°F (175°C).
- Bake the combined layers for about 30-35 minutes or until the topping is golden brown and the apples are tender.
A little tip: let them cool for at least 15 minutes before cutting. This allows the bars to set and makes serving much easier.
In conclusion, making apple bars is a straightforward process that brings joy with every bite. Experimenting with spices or adding a scoop of vanilla ice cream on top can elevate the experience even further. Don’t forget to share your finished creation and perhaps even pair it with a warm cup of apple cider for that cozy touch. Happy baking!
Variations on Apple Bars
Gluten-Free Apple Bars
Are you looking for delicious apple bars that cater to gluten sensitivities? You’re in luck! Making gluten-free apple bars is simple and satisfying. Just swap out regular flour for a high-quality gluten-free blend, which is easily available online or at your local grocery store.
Here’s a quick gluten-free twist for your bars:
- Use almond flour or coconut flour in place of all-purpose flour.
- Add a tablespoon of flaxseed meal for extra fiber and health benefits.
- You can sweeten the mix with natural sweeteners like maple syrup or honey for a delightful touch.
This variation doesn’t compromise on taste and will surely impress gluten-free friends at your next gathering!
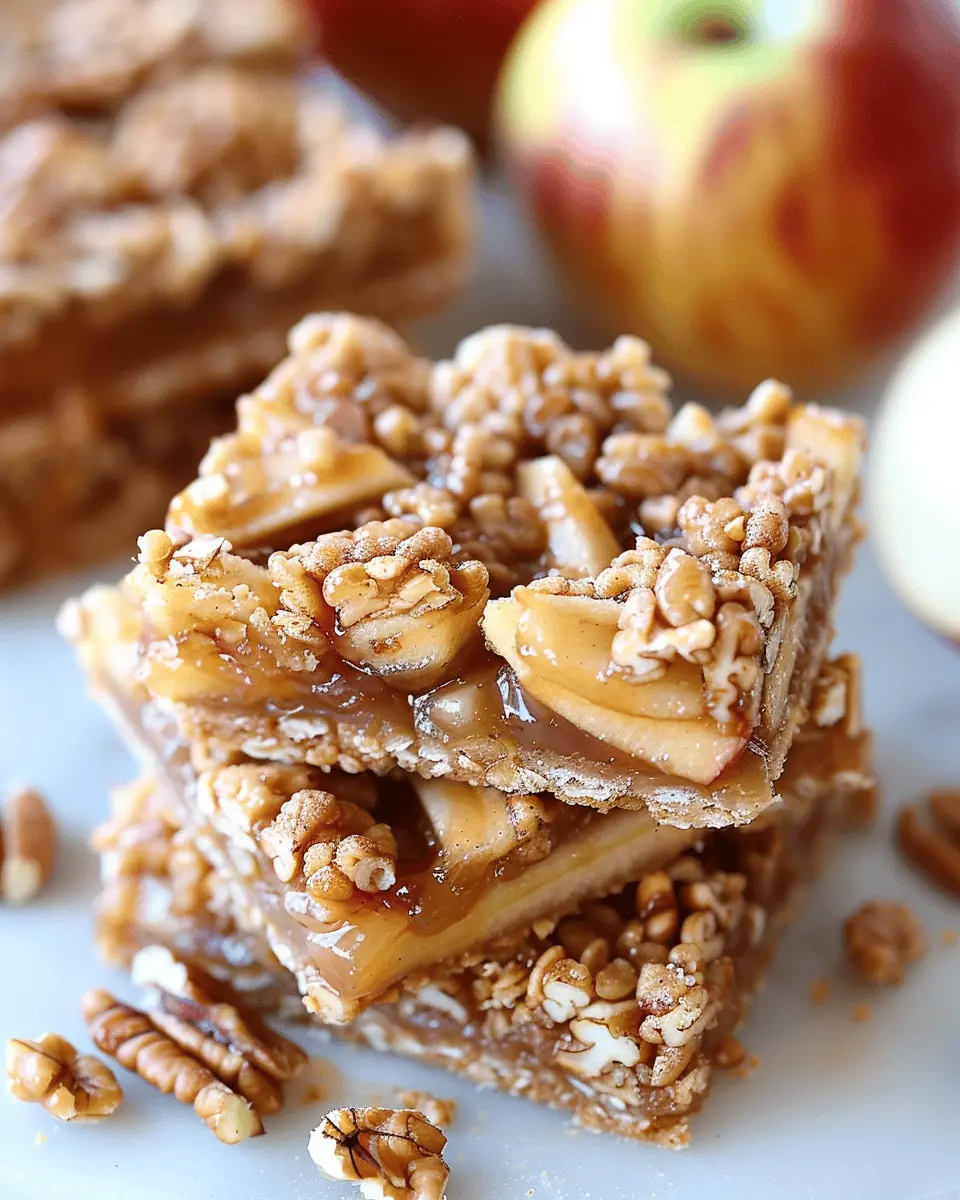
Apple Nut Crumble Bars
Craving a bit of crunch? Try apple nut crumble bars! These bars take the classic recipe and elevate it with a nutty, crumbly topping. You can use your favorite nuts—walnuts, pecans, or even almonds work wonderfully.
To make the crumble topping:
- Combine equal parts oats and your choice of nuts.
- Add a sprinkle of cinnamon and a touch of brown sugar for a lovely caramel note.
- Bind this mixture with melted coconut oil or butter to create a perfect crunchy topping.
Not only does this add texture, but it also brings a richness that complements the sweetness of the apples.
Feeling inspired? Why not experiment with other fruits or spices, like cranberries or ginger, to create unique flavor profiles? You can find more great tips and recipes at sites like Serious Eats or AllRecipes. Enjoy your baking adventure!
Cooking Tips and Notes for Apple Bars
When it comes to baking apple bars, there are a few tips and tricks that can take your treats from good to great.
Choosing the Right Apples
The type of apples you use can greatly affect the flavor and texture of your bars. Consider using a mix of tart and sweet varieties. Granny Smith for tartness, paired with Honeycrisp or Fuji for sweetness, creates a delightful balance.
Perfecting Your Crust
A buttery, flakey crust is key. Make sure your butter is cold when mixing; this helps create that perfect flaky texture. For extra richness, consider adding a tablespoon of sour cream or Greek yogurt to your dough.
Spice It Up
Don’t be shy with spices! Cinnamon and nutmeg complement apples beautifully. A pinch of ground ginger can also add a surprising twist. For more tips on flavor pairings, check out this resource on spicing up desserts.
Let Them Rest
After baking, let your apple bars cool completely before cutting. This helps them set and makes for cleaner slices. Trust me, patience pays off!
With these tips, your apple bars will be a hit at your next gathering!
Serving Suggestions for Apple Bars
If you’ve just baked a batch of apple bars, you might be wondering how to bring out their best flavors. Here are some serving suggestions that are sure to impress your friends and family.
Simple Pairings
Apple bars are delightful on their own, but pair them with some tasty accompaniments for an elevated experience:
- Vanilla Ice Cream: A scoop of creamy vanilla ice cream adds a lovely contrast to the warm spices of the bars.
- Greek Yogurt: For a healthier option, try serving your apple bars with a dollop of Greek yogurt mixed with a drizzle of honey.
- Whipped Cream: Light and fluffy whipped cream can transform your dessert into a luxurious treat.
Beverages to Sip
To round off your apple bar experience, consider these refreshing drink options:
- Tea: A warm cup of chai or herbal tea can complement the flavors beautifully.
- Apple Cider: Hot or cold apple cider makes for a fantastic pairing, enhancing the apple flavor in your dessert.
Presentation Matters
Don’t forget about aesthetics! Serve your apple bars on a rustic wooden board, sprinkled with powdered sugar, and garnished with a few apple slices. It not only enhances the visual appeal but also makes for great conversation around the dinner table.
Feeling inspired? Check out more on dessert pairings and presentation ideas at Epicurious or Food52. Happy baking!
Time breakdown for Apple Bars
Preparation time
Getting your apple bars ready is a breeze and will take about 20 minutes. During this time, you’ll be peeling and chopping apples, mixing your ingredients, and preparing the baking dish. It’s a perfect opportunity to put on your favorite playlist and enjoy the process!
Baking time
You’ll bake your delicious apple bars for 25-30 minutes. The key is to keep an eye on them—experience tells us that the aroma of baking apples is simply irresistible and may tempt you to peek!
Total time
All in all, set aside around 50-60 minutes from start to finish. This includes prep and bake time, giving you a sweet treat to enjoy in no time.
If you’re looking for a great guide on baking times, check out The Kitchn. Happy baking!
Nutritional facts for Apple Bars
When it comes to indulging in apple bars, it’s essential to know how they can fit into your diet. Let’s break down some key nutritional aspects.
Calories
These delicious treats typically contain around 150-200 calories per bar. This makes them a great option for a mid-afternoon snack or a dessert without going overboard on calories. Just be mindful of portion sizes, as it’s easy to enjoy a few too many!
Sugars
While fresh apples contribute natural sweetness to apple bars, you may find added sugars in certain recipes. On average, each bar can have about 10-15 grams of sugar. Opt for recipes that use ripe, sweet apples to minimize the need for additional sweetness.
Fiber
One of the best things about apple bars is their fiber content. Expect around 2-3 grams of fiber per serving, thanks to the apples and whole grains often used in the crust. Fiber is great for digestion and can help keep you feeling full longer. It’s like a little bonus for choosing a sweet treat!
For more nutritional insights, consider checking out resources from the Academy of Nutrition and Dietetics or the USDA’s FoodData Central. Eating well starts with being informed!
FAQs about Apple Bars
How can I make my apple bars even more delicious?
If you want to elevate your apple bars, consider adding a splash of lemon juice or a dash of cinnamon to the apple filling. This not only enhances the flavor but also adds a zesty touch. For extra texture and flavor, fold in some chopped nuts or a mix of dried fruits. You might also want to try glazing your bars with a simple icing made from powdered sugar and vanilla to give them that bakery-fresh vibe.
Can I use different types of apples?
Absolutely! While Granny Smith apples are a classic choice for apple bars due to their tartness, you can experiment with a variety of apples like Honeycrisp, Fuju, or Braeburn. Each kind will add its unique flavor profile and sweetness level, making your bars even more exciting. Let your taste buds guide you, and why not check out an article on the best apples for baking on sites like Epicurious or Food Network?
How do I store leftover apple bars?
To keep your apple bars fresh, store them in an airtight container at room temperature for a couple of days. If you need them to last longer, refrigeration is a great option. Just remember to let them come to room temperature before serving, as they’ll taste much better that way. If you want to extend their shelf life, you can freeze them for up to three months! Just wrap them tightly in plastic wrap and place them in a freezer-safe bag. When you’re ready to enjoy again, let them thaw in the fridge overnight, and you’ll have a delightful treat waiting for you.
Now you’re all set to tackle those apple bars with confidence! Happy baking!
Conclusion on Apple Bars
In summary, apple bars are not just a delicious treat but also a fantastic way to impress your friends and family. These delightful desserts can be customized for various occasions, whether it’s a cozy gathering or a picnic in the park. By adding your favorite spices or opting for different types of apples, you can create a unique flavor profile every time. They are simple to make and can be paired beautifully with a scoop of ice cream or a dollop of whipped cream for that extra touch. Want to elevate your baking skills? Check out more delicious recipes at Food Network for inspiration! After all, nothing beats the warmth of homemade goodness.
PrintApple Bars: Easy and Indulgent Homemade Treat for Everyone

Delight in these easy and indulgent homemade apple bars that everyone will love!
- Prep Time: 20 minutes
- Cook Time: 35 minutes
- Total Time: 55 minutes
- Yield: 16 bars 1x
- Category: Dessert
- Method: Baking
- Cuisine: American
- Diet: Vegetarian
Ingredients
- 4 large apples
- 1 cup granulated sugar
- 1/2 cup brown sugar
- 2 teaspoons cinnamon
- 3 cups all-purpose flour
- 1 cup unsalted butter
- 1/4 teaspoon salt
- 1 teaspoon baking soda
Instructions
- Preheat the oven to 350°F (175°C).
- Peel and slice the apples.
- In a bowl, mix sugars and cinnamon with sliced apples.
- In another bowl, combine flour, salt, and baking soda.
- Cream butter and sugars until light and fluffy.
- Add the flour mixture gradually to the butter mixture.
- Fold in the apple mixture.
- Pour into a greased baking dish.
- Bake for 30-35 minutes or until golden brown.
- Allow cooling before slicing into bars.
Notes
- Serve with ice cream for added indulgence.
- These bars can be stored for up to a week.
Nutrition
- Serving Size: 1 bar
- Calories: 250
- Sugar: 18g
- Sodium: 120mg
- Fat: 10g
- Saturated Fat: 6g
- Unsaturated Fat: 4g
- Trans Fat: 0g
- Carbohydrates: 36g
- Fiber: 2g
- Protein: 2g
- Cholesterol: 30mg
Keywords: Apple Bars, Homemade Treats, Dessert