Introduction to Christmas Bars
As the holiday season approaches, many of us start thinking about those special treats that bring a sense of warmth and joy to our celebrations. Enter Christmas bars, a versatile favorite that combines festive flavors and textures, perfect for sharing with friends and family. These deliciously decadent desserts make their way into our hearts and holiday spread, becoming the ultimate festive treat.
Why Are Christmas Bars the Ultimate Festive Treat?
The beauty of Christmas bars lies in their adaptability. Have you ever wanted a dessert that checks all the boxes: easy to make, delicious, and visually appealing? This is where Christmas bars shine. They can incorporate seasonal ingredients like peppermint, gingerbread, cranberries, and more, allowing you to create a delectable assortment on your dessert table.
Consider these enticing qualities:
-
Easy Preparation: Unlike traditional layered cakes or intricate pastries, Christmas bars generally require fewer steps and less time in the kitchen. Many recipes involve mixing ingredients, pouring them into a pan, and baking. You’ll have more time to enjoy the festivities!
-
Portion Control: Slicing these bars into squares makes them perfect for sharing. This way, everyone gets to taste a bit of everything without feeling overwhelmed by a hefty slice of cake.
-
Creative Combinations: Whether you prefer rich chocolate, tangy citrus, or hearty nuts, the possibilities are endless. Think about adding a layer of creamy filling or a sprinkle of festive sprinkles for that extra holiday cheer.
These treats are also an excellent opportunity to involve friends and family in the kitchen. You might even discover a new holiday tradition, perhaps hosting a Christmas bar baking party.
For more inspiration on holiday baking, check out Taste of Home or Bon Appétit. You’ll find countless ideas that can ignite your creativity and add excitement to your holiday season.
So, if you’re ready to add a sprinkle of joy to your next gathering, grab your apron, and let’s dive into the delightful world of Christmas bars! Your friends and family will thank you for it.
Ingredients for Christmas Bars
When it comes to making delightful Christmas bars, having the right ingredients can make all the difference. These festive treats are not just about the flavors; they also carry the spirit of the season. Below, I’ve outlined everything you need to create your very own batch of holiday magic.
Essential Ingredients
-
Base Layer
-
1 cup of graham cracker crumbs: This gives your bars a solid and crunchy foundation.
-
1/2 cup of melted butter: Butter adds richness and helps bind the crumbs together.
-
Filling
-
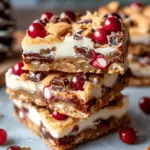
1 cup of white chocolate chips: These provide sweetness and a creamy texture.
-
1/2 cup of chopped nuts (like walnuts or pecans): For that lovely crunch and nutty flavor.
-
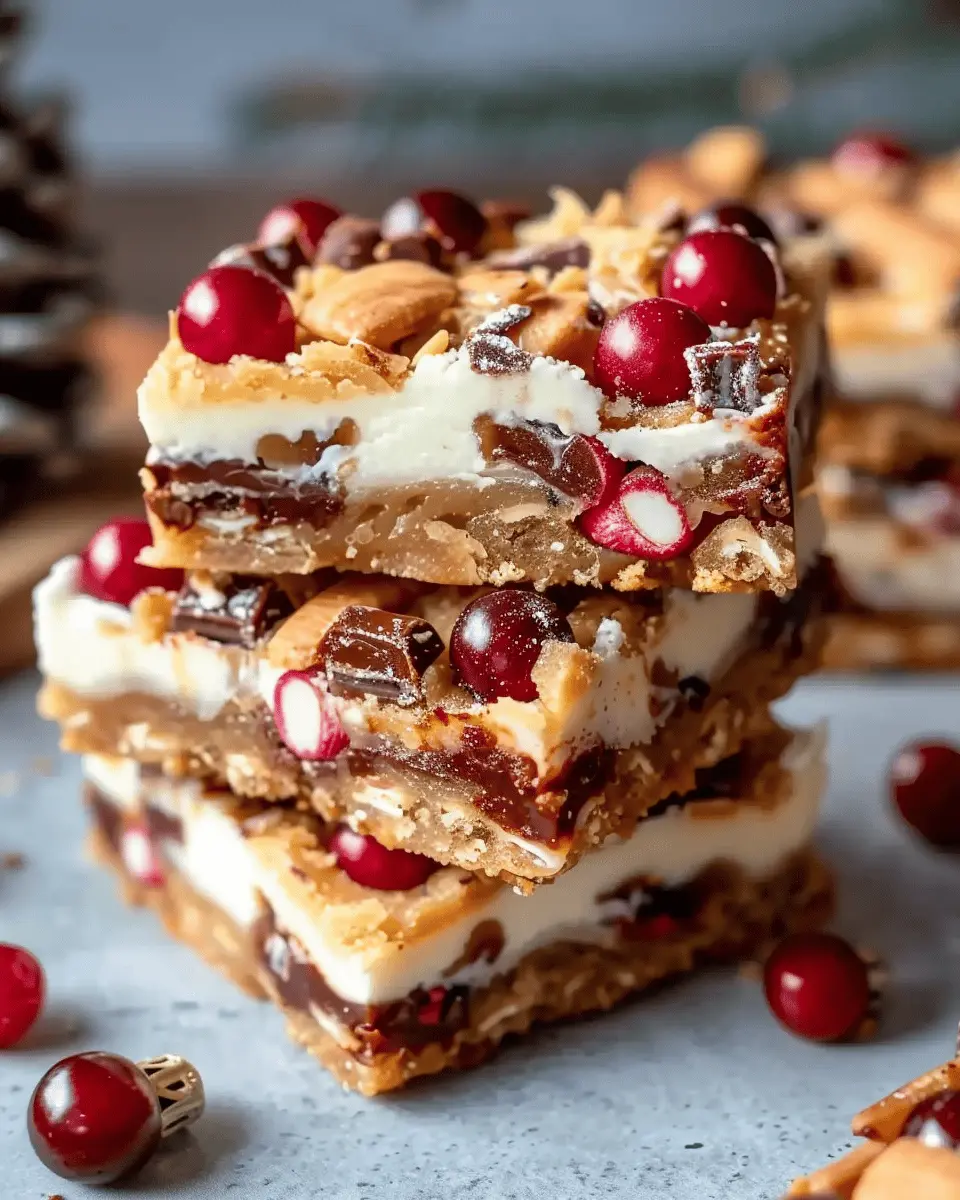
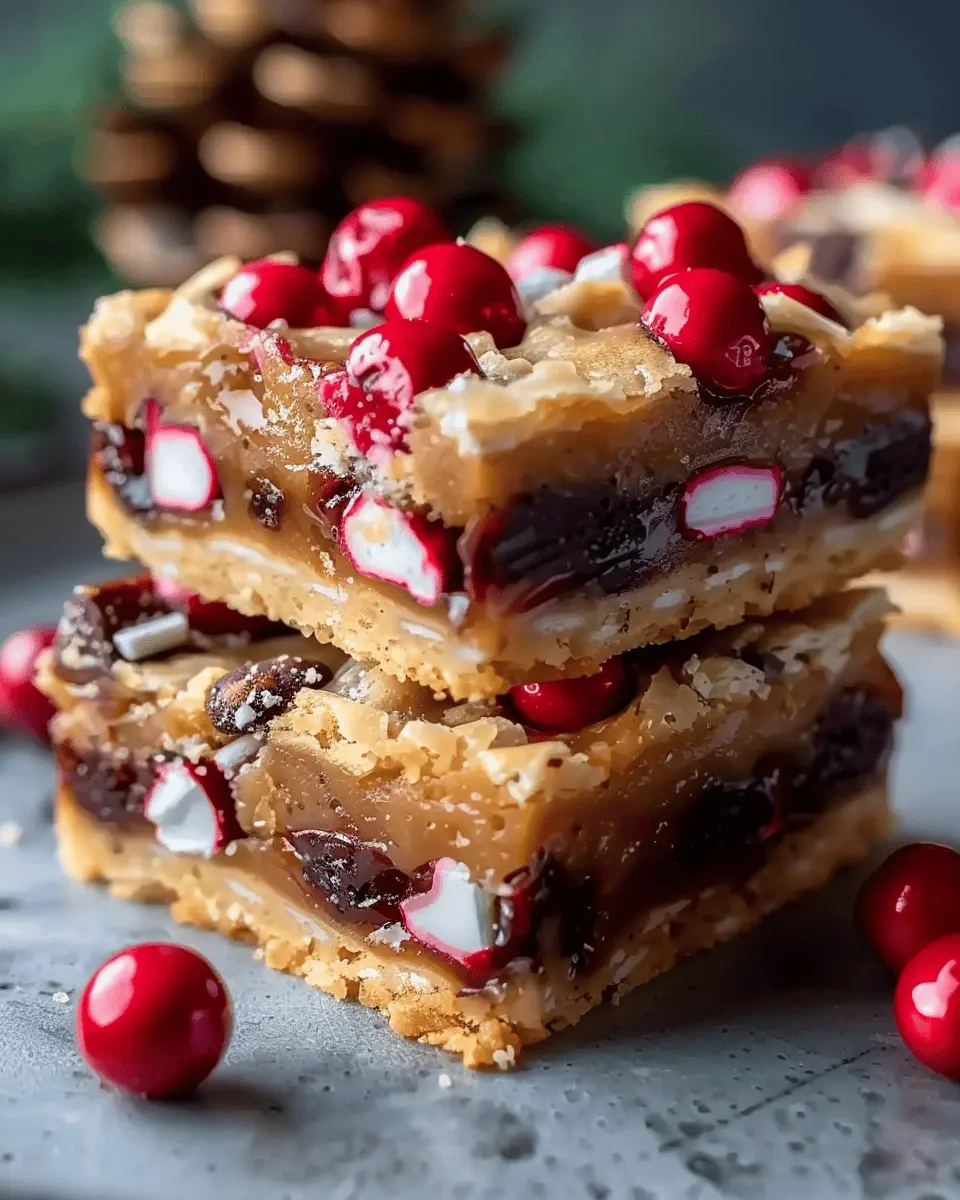
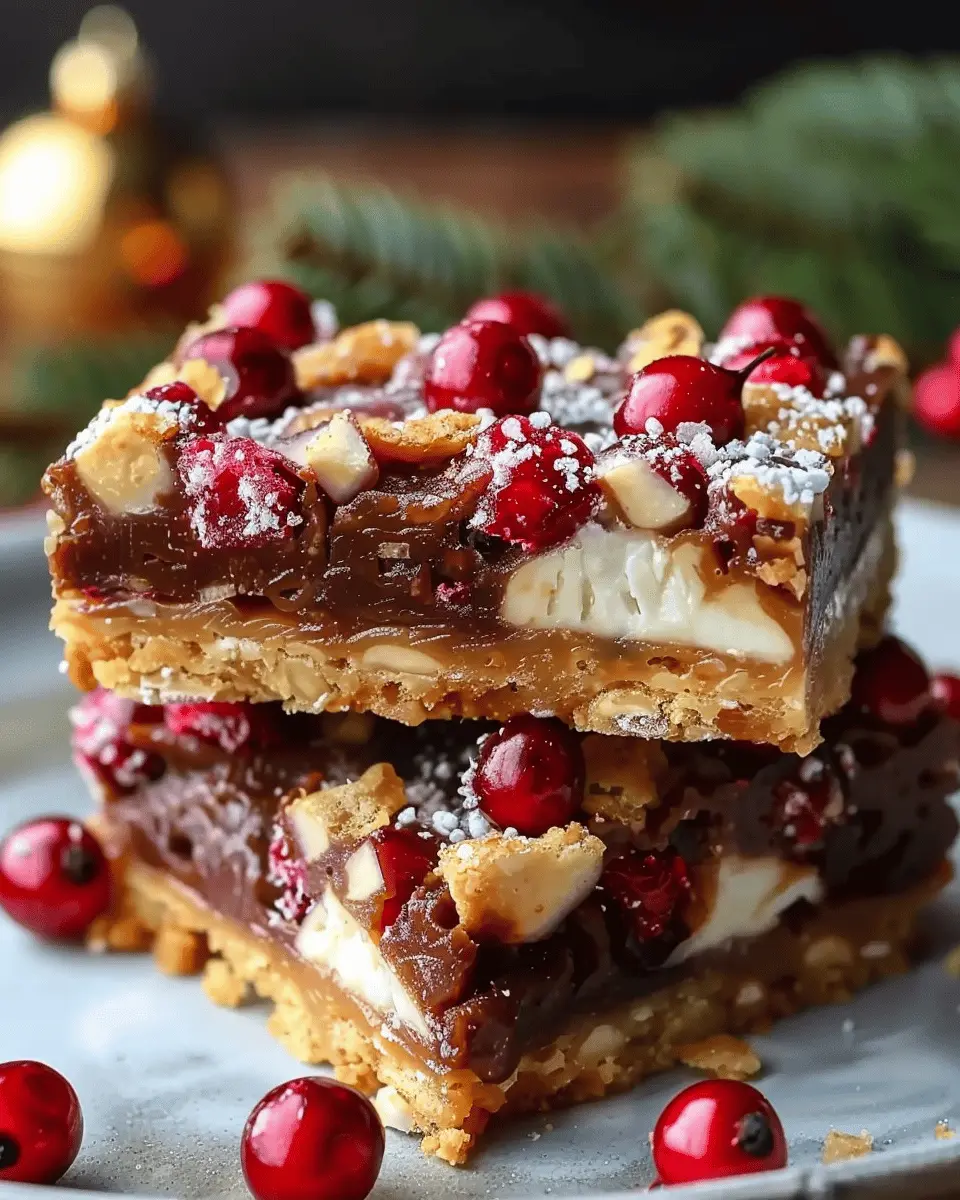
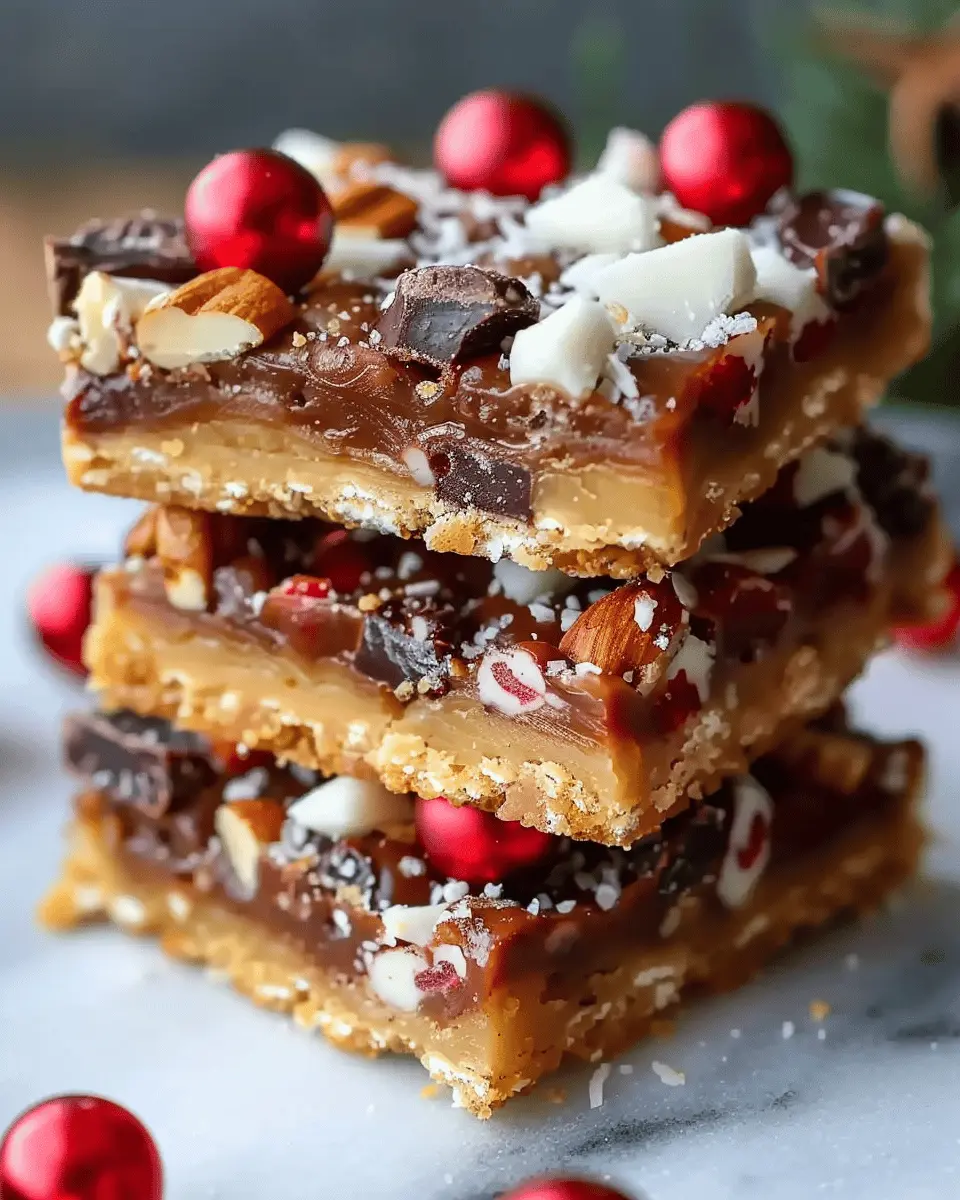
1 cup of dried cranberries or cherries: These add a pop of color and tartness.
-
Toppings
-
A sprinkle of sea salt: It enhances all the sweet flavors.
-
Optional: Drizzle of dark chocolate for a touch of decadence.
Having these Christmas bar ingredients prepped helps streamline your baking process. You might also consider substituting in your favorite mix-ins or exploring variations. Remember, the joy of baking during the holidays is all about experimenting and creating something that feels uniquely yours!
Looking for more festive recipes? Check out Food Network for inspiration.
Step-by-Step Preparation of Christmas Bars
The holidays are upon us, bringing joy, cheer, and of course, the delightful taste of Christmas. One treat that always brings smiles is Christmas bars. These sweet, festive squares are perfect for gatherings, or simply to enjoy during cozy nights in. Let’s dive into the simple steps that will guide you through creating these delicious bars that are sure to be a hit!
Preheat your oven
Before you start mixing and measuring, it’s time to kick things off by preheating your oven. Set it to 350°F (175°C). This step is crucial because it ensures your Christmas bars bake evenly and turn out perfectly gooey and delicious. Preheating may seem minor, but it can make a world of difference when it comes to texture. While your oven warms up, you can focus on preparing the other elements of your recipe.
Mix the dry ingredients
Now that your oven is heating, grab a large mixing bowl. Here’s what you’ll need for the dry ingredients:
- 1 cup all-purpose flour
- 1/2 cup brown sugar
- 1 teaspoon baking powder
- 1/4 teaspoon salt
- 1 teaspoon cinnamon (optional for that warm holiday flavor)
Whisk together these ingredients until they’re well combined — you want to see a uniform blend without clumps. If you’re feeling adventurous, consider adding a pinch of nutmeg or ginger for an extra festive kick. Why not? Christmas is all about flavor! For an insightful read on ingredient combinations, check out Bon Appétit.
Combine wet ingredients
In a separate bowl, let’s mingle the wet ingredients. You’ll need:
- 1/2 cup unsalted butter, melted
- 1 large egg
- 1 teaspoon vanilla extract
- 1/4 cup honey or maple syrup (for natural sweetness)
Whisk these together until they are smooth and well-combined. Mix them gently to ensure a lovely incorporation; too much whisking can introduce unnecessary air. The aroma of vanilla is potent; doesn’t it just make you feel festive?
Fold in the fun ingredients
Now comes the most exciting part—adding the fun ingredients that will truly make these Christmas bars special. You can go with:
- 1/2 cup chocolate chips (dark or milk, your choice!)
- 1/3 cup dried cranberries or cherries for a fruity twist
- 1/4 cup nuts (like walnuts or pecans) for the crunch factor
- Optional: a sprinkle of shredded coconut for extra texture
Gently fold the dry and wet ingredients together, then add your fun mix-ins. It’s like creating a magical potion, combining flavors and textures that sing of holiday cheer.
Spread and bake
Once your mixture is ready, grab a greased baking pan (around 8×8 inches works well) and pour the batter in. Spread it out evenly. Use a spatula to make sure it fills the corners, as nobody likes an undercooked edge! Bake in the preheated oven for 25-30 minutes or until the edges turn golden brown and a toothpick inserted in the center comes out clean.
Cool and cut into squares
After your Christmas bars have baked to perfection, it’s crucial to let them cool completely in the pan. This step typically takes about 30 minutes. Patience here pays off, as it helps set the bars, making them easier to cut. Once cool, slice them into squares or rectangles, whatever suits your fancy!
Gather your friends or family around, and watch as they delight in the flavors of the season. These Christmas bars are not just a treat; they are a memory in the making. Enjoy with a cup of hot cocoa, and you’ve got the perfect festive snack. Happy baking!
Variations on Christmas Bars
When it comes to Christmas bars, the possibilities are endless! Here are some delightful variations that cater to different tastes and dietary preferences.
Mint Chocolate Christmas Bars
If you’re a fan of the classic mint chocolate duo, these bars will make your holiday spirit shine! Imagine a chocolate base infused with peppermint extract, topped with silky smooth ganache. A sprinkle of crushed candy canes takes this treat over the top.
Ingredients:
- Chocolate cookie crust
- Mint-flavored frosting
- Dark chocolate ganache
- Crushed candy canes
This combination not only satisfies sweet cravings but also adds a festive flair to your dessert table!
Nut-Free Christmas Bars
For those worried about nut allergies, creating nut-free Christmas bars can be a lifesaver. Opt for sunflower seeds or oats to add texture and flavor without the risk. Consider a chocolate and coconut combination to keep it indulgent yet safe for all.
Gluten-Free Christmas Bars
Catering to gluten-sensitive guests can be a breeze with gluten-free Christmas bars. Substitute regular flour with almond flour or a gluten-free blend. You can prepare a rich brownie base or a fruity layer with cranberries for a pop of color and taste. Check out sources like Gluten Free Living for more innovative recipes.
Vegan Christmas Bars
Who said Christmas bars can’t be plant-based? Incorporating bananas and dates can provide richness without the eggs or dairy. Blend up a base of nuts and oats, and top it with a chocolatey drizzle made from cocoa powder, almond milk, and maple syrup. Delicious and kind to the planet!
These variations not only cater to different dietary needs but also keep everyone at your gathering merry and satisfied. Celebrate Christmas with treats everyone can enjoy!
Cooking Tips and Notes for Christmas Bars
Creating the perfect Christmas bars can be a delightful experience. Here are some friendly tips to guide you through the process:
Essential Tips for Successful Bars
- Preheat Properly: Ensure your oven is preheated to the right temperature before baking. This helps the bars bake evenly.
- Use Quality Ingredients: Fresh, high-quality ingredients make a world of difference. Opt for pure vanilla extract and fresh spices when possible.
Troubleshooting Common Issues
- Too Crumbly? If your bars are too crumbly, try adding a bit more liquid, like milk or melted butter. This can help bind the ingredients better.
- Overcooked? If your bars come out dry, consider reducing the baking time slightly next round. Every oven is different, so keep an eye on them!
Ingredient Substitutions to Consider
- Nut-Free Options: Swap nuts for seeds, such as sunflower or pumpkin seeds, for a satisfying crunch without the allergens.
- Sweetener Alternatives: For a healthier option, consider using maple syrup or agave nectar instead of refined sugar.
Remember, experimenting with your Christmas bars is part of the fun! Don’t hesitate to adjust ingredients to suit your taste. Happy baking! For more baking insights, check out resources like Ballistic Baking and Baking With Butter.
Serving Suggestions for Christmas Bars
Pairing with Festive Beverages
Your Christmas bars deserve the perfect beverage sidekick! Consider warm drinks like spiced apple cider or creamy hot cocoa. Both bring out the spices and sweetness in the bars, creating a cozy winter vibe. For something more adventurous, you can try mixing up a festive tea blend or a home-brewed chai. Whichever beverage you choose, just imagine the delightful aromas wafting through your home during the holidays!
Adding a Scoop of Ice Cream
A scoop of vanilla or cinnamon ice cream on top of your Christmas bars creates a heavenly dessert experience! The cold creaminess pairs beautifully with the rich, spiced flavors of the bars. You can even mix it up with flavors like peppermint or gingerbread, enhancing that festive touch.
Creative Garnishing Ideas
Sprucing up your Christmas bars can be as fun as baking them! Try drizzling melted white chocolate or caramel over the top for an eye-catching finish. You could also sprinkle crushed candy canes for a pop of color and a refreshing crunch. Add fresh berries or a dusting of powdered sugar to elevate the presentation, making them not just a treat for the taste buds but for the eyes as well!
For more festive inspiration, check out resources like Taste of Home or Food Network for ideas to make your holiday gatherings truly special.
Time Breakdown for Christmas Bars
Preparation Time
To start your festive journey, set aside about 15-20 minutes for preparation. This includes gathering your ingredients and mixing that delightful batter you’ll use for your Christmas bars. Trust me, the aromatic spices combined with chocolate will have you dreaming of Christmas morning!
Baking Time
Now, the fun part—baking! Your Christmas bars will need approximately 25-30 minutes in the oven. Keep an eye on them, as the sweetness of the holiday season deserves perfectly baked treats.
Cooling Time
Once they’re out of the oven, patience is key. Let your bars cool for about 15-20 minutes. This brief cooling period allows the flavors to meld beautifully, creating a fantastic texture that you won’t want to skip!
Total Time
In total, you’re looking at about 60-70 minutes from start to finish, making this a quick yet satisfying holiday baking session. Don’t forget to grab your favorite drink—perhaps a warm apple cider—to enjoy while you bake. Happy baking!
Nutritional Facts for Christmas Bars
When indulging in Christmas bars, it’s good to know what you’re enjoying. These festive treats can vary in ingredients, but here’s a general nutritional breakdown:
Calories per serving
Each serving of these delightful Christmas bars typically contains around 150-200 calories. While that’s not too heavy, it’s always wise to keep portions in check—especially during the holiday season!
Sugar content
Most Christmas bars may have 10-15 grams of sugar per serving. While it’s all about balance, opting for natural sweeteners or reducing sugar can make a big difference. If you’re interested in healthier substitutes, check out this resource on sugar alternatives.
Suggested serving size
A recommended serving size for Christmas bars is about 1-2 inches square. This way, you can savor the flavors without overindulging; it’s all about enjoying the festive spirit while being mindful of your health!
So, as you prepare and share these delicious Christmas bars this season, remember that moderation is key to fully enjoying all the festivities!
FAQs about Christmas Bars
Can I make Christmas bars ahead of time?
Absolutely! One of the greatest aspects of Christmas bars is their ability to be prepared well in advance. You can make them a few days ahead of your holiday gathering to save time. Just be sure to allow them to cool completely before cutting and storing them.
How should I store Christmas bars?
To keep your Christmas bars fresh, store them in an airtight container at room temperature for up to a week. If you live in a humid climate, it’s best to refrigerate them to maintain their texture. Layer parchment paper between bars if they’re stacked to prevent sticking.
What can I substitute in the recipe?
If you’re looking to personalize your Christmas bars, there are plenty of substitutions. For example, you can use almond flour instead of regular flour for a gluten-free option. Unsweetened applesauce works well in place of sugar for a healthier twist, and feel free to swap in your favorite nuts or dried fruits based on your taste!
Are Christmas bars kid-friendly?
Definitely! Christmas bars are perfect for kids and adults alike. You can even let the little ones help with decorating them, making it a fun family project that gets everyone involved. Just be mindful of any ingredient allergies.
Can I freeze Christmas bars?
Yes, you can freeze your Christmas bars! Wrap them tightly in plastic wrap and then in aluminum foil to prevent freezer burn. Properly stored, they can last for up to three months. Just remember to thaw them at room temperature before serving.
For more tips on holiday recipes, consider checking out The Spruce Eats or Food Network. Happy baking!
Conclusion on Christmas Bars
The lasting joy of homemade Christmas bars
In the flurry of the holiday season, Christmas bars offer a delightful way to spread warmth and cheer. The joy of crafting these bars from scratch isn’t just about the delicious end result; it’s about the memories created in the kitchen. Picture gathering with friends or family, sharing stories and laughter as you mix, bake, and taste along the way.
Homemade Christmas bars not only bring joy to your taste buds but also make perfect gifts. Just wrap them up nicely, and you’re set! Embrace this charming tradition and let your creativity shine. For more baking inspiration, check out sites like AllRecipes and Food Network for additional festive ideas!
PrintChristmas bars: Easy and Indulgent Treats for Your Holiday Table
Delight your guests this holiday season with these easy and indulgent Christmas bars that are sure to impress.
- Prep Time: 15 minutes
- Cook Time: 30 minutes
- Total Time: 45 minutes
- Yield: 16 bars 1x
- Category: Dessert
- Method: Baking
- Cuisine: American
- Diet: Vegetarian
Ingredients
- 1 cup unsalted butter
- 1 cup granulated sugar
- 1 cup packed brown sugar
- 2 large eggs
- 2 teaspoons vanilla extract
- 3 cups all-purpose flour
- 1 teaspoon baking powder
- 1/2 teaspoon salt
- 2 cups chocolate chips
Instructions
- Preheat your oven to 350°F (175°C) and grease a 9×13 inch baking pan.
- In a large mixing bowl, cream together the butter, granulated sugar, and brown sugar until smooth.
- Add the eggs and vanilla, mixing well.
- In another bowl, combine the flour, baking powder, and salt. Gradually add to the butter mixture.
- Fold in the chocolate chips until evenly distributed.
- Spread the mixture into the prepared baking pan.
- Bake for 25-30 minutes or until lightly golden. Allow to cool before cutting.
Notes
- These bars can be customized with nuts or dried fruits for extra flavor.
- For a festive touch, sprinkle some powdered sugar on top before serving.
Nutrition
- Serving Size: 1 bar
- Calories: 250
- Sugar: 20g
- Sodium: 150mg
- Fat: 12g
- Saturated Fat: 7g
- Unsaturated Fat: 4g
- Trans Fat: 0g
- Carbohydrates: 34g
- Fiber: 1g
- Protein: 3g
- Cholesterol: 30mg
Keywords: Christmas bars, holiday treats, dessert recipes